Saving animation as.

Necessary
- - VirtualDub program;
- - Photoshop program;
- - video file.
Instructions
Step 1
The sequence of frames that will make up the animated picture of the user can be drawn with your own hands, or can be extracted from the video. This is where VirtualDub comes in handy. Open in this editor the file containing the image suitable for the avatar using the hotkeys Ctrl + O.
Step 2
After starting the file playback, or using the keys that control the movement of the cursor, find the frame from which the animation will begin. Copy it using the keyboard shortcut Ctrl + 1.
Step 3
Paste the copied image into a new Photoshop document. To create a new file, use the New option from the File menu. Click the OK button in the document settings window and add the first layer to it using the Paste option of the Edit menu.
Step 4
Switch to the VirtualDub window and move to the next frame using the Next frame option from the Go menu. Copy the frame and paste it into a document open in Photoshop. In this way, make as many layers as you need in order to capture the movement of the object that you are going to put on the avatar.
Step 5
Crop the unnecessary part of the image with the Crop Tool, leaving a rectangle corresponding to the proportions of the future avatar. Press the Enter key to apply the crop.
Step 6
Resize the layered document to the size of the user picture allowed by the rules of the resource where you intend to use it. This can be done with the Image Size command from the Image menu. Insert the desired values into the fields for the width and height of the image and click on the OK button.
Step 7
Turn off all layers in the created document except for the very bottom one. To do this, in the layers palette, click on the eye icon to the left of each layer.
Step 8
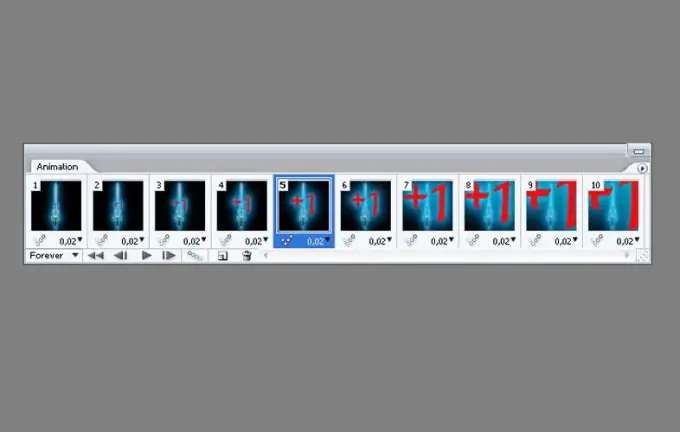
Open the animation palette. This can be done with the Animation command of the Window menu. The content of the visible layer is already displayed in this palette as the first frame of the animation. Create a second frame with the Duplicate Selected Frames button at the bottom of the animation palette. Turn on the second layer from the bottom in the layers palette. After that, the image in the second frame of the animation will match the contents of the enabled layer.
Step 9
Create as many frames of animation as there are layers in your document. Set the duration of the frames. To do this, select the entire contents of the animation palette and set the desired time by clicking on the Sets frame delay time button. This is a triangle that can be seen at the bottom of every frame.
Step 10
Start the animation playback using the Play button. Edit the result by removing unnecessary frames. To do this, click on the frame and click on the trash can icon at the bottom of the palette.
Step 11
Save the avatar to a file with the.gif"


