Sunny weather is an excellent condition for pleasant and beautiful photography, but it often happens that glare from bright sunlight appears on the model's skin in long-awaited photos. This lens flare gives the impression of being blown out of certain areas of the photo, and some photographers find that highlights cannot be corrected. In fact, there is such an opportunity - for this you have to work with brushes and layer blending modes in Photoshop.

Instructions
Step 1
Open the photo for editing. Create a new layer and select Eye Dropper from the toolbar. Click with the eyedropper on the skin of the person in the photo, choosing a medium skin tone - not the darkest, but not the lightest, between the highlights and shaded areas. The desired color is automatically detected on the palette.
Step 2
After that take a small soft brush and on a new layer paint over all the highlights with the chosen color. The photo began to look unnatural, and the skin lost its naturalness - so the next step is to set the desired layer blending mode.
Step 3
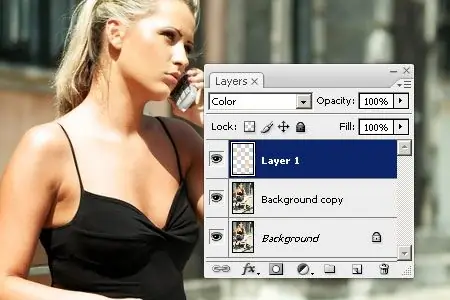
Create a copy of the original layer (Background copy) using the Duplicate layer command. Place the copy between the original layer and the new layer where you painted the highlights. After that change the blending mode of the layers to Color in the Blending mode line.
Step 4
On the toolbar, take the Burn tool and set the brush hardness to zero, in the Range section set it to Highlights, and in the Exposure section - 10%.
Step 5
Using a brush with the settings and a suitable diameter, paint over the exposed parts of the photo again to smooth the skin and make it even.
Step 6
Zoom in on the photo and carefully examine all areas of the skin for any unnatural color spots that appear after processing. If there are any, grab the Blur tool from the toolbar and lightly blend the edges of the spots so that they do not stand out on the skin.
Step 7
Click on the second layer in the list (Background copy) and change its opacity to 50%. The photo is ready - you can once again check how well too bright highlights are smoothed out, and, merging the layers, save the photo.


