Digital shots are convenient for everyone. They can be conveniently stored, transferred and viewed. However, when browsing through collections of digital photographs, it is not uncommon to find images rotated from their natural position. These images are obtained by rotating the camera appropriately when shooting. When viewing such pictures, you involuntarily have to think about how to rotate the photo. Modern graphic editors make this very easy.

Necessary
A universal free graphics editor GIMP, available for download on the official website
Instructions
Step 1
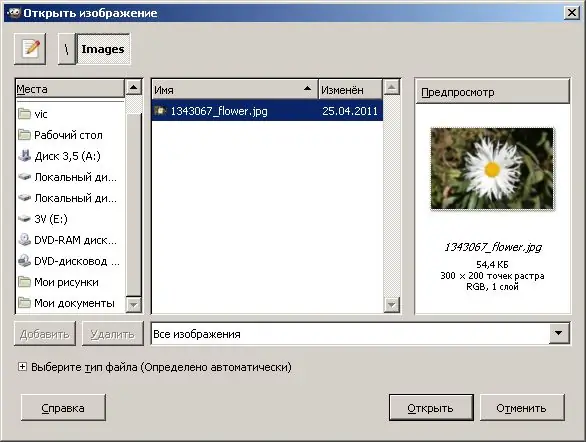
Open the photo in the GIMP editor. In the main menu of the application, select the "File", "Open" items. A file selection dialog will appear. In the left list of the "Open Image" dialog select the disk containing the photo. In the list in the center of the dialog, follow the directory structure to the directory with the desired photo. Select the photo file. Click the "Open" button.
Step 2
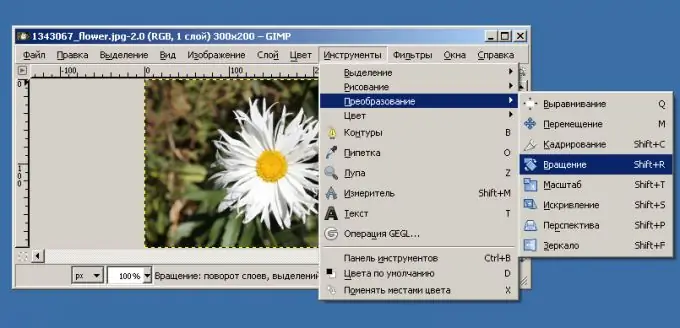
Activate the Rotate tool. To do this, sequentially select the menu items "Tools", "Transformation", "Rotation". The "Rotation" dialog will open. This dialog can also be opened by pressing the Shift + R key combination.
Step 3
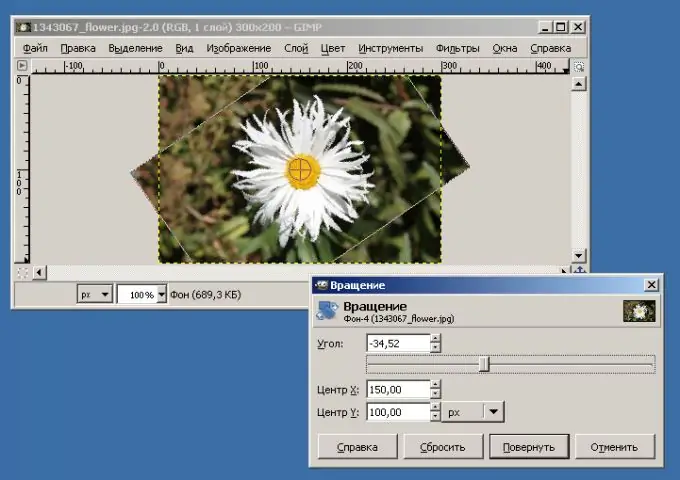
Rotate the photo to the desired angle. In the "Rotation" dialog, enter the angle of rotation of the photo in the "Angle" field, or set it by moving the slider below. The photo will rotate around the center with the coordinates entered in the Center X and Center Y boxes. The current position of the photo will be displayed in the image editing window. With the photo's rotation angle set, click the Rotate button in the Rotation dialog.
Step 4
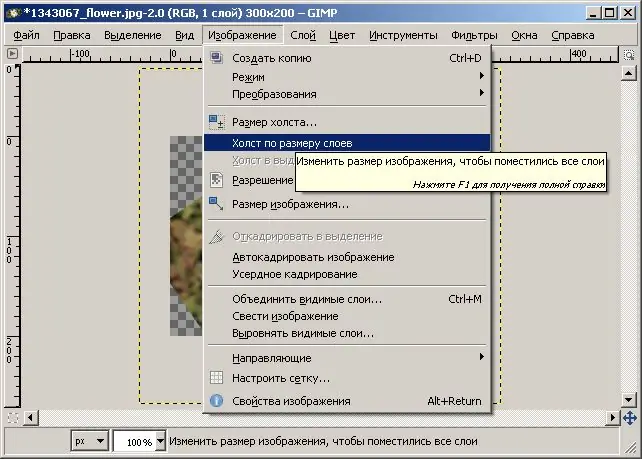
Resize the canvas to fit the new image size. From the menu, select "Image" and "Canvas to Fit Layers". After that, the entire image in the editing window can be seen.
Step 5
Save the rotated photo. Select "File" and "Save As …". In the dialog that appears, specify the new file name, as well as the format and path to save it. Click on the "Save" button.


