A cursory estimate of the number of tools in Adobe Photoshop can throw an untrained person into a brief panic. However, for specific tasks, for example, for processing photographs, you may need only a few of them.

Instructions
Step 1
Launch the Adobe Photoshop program (when writing an article, the Russian version of CS5 is used) and open any photo: "File"> "Open"> select an image> "Open".
Step 2
If you need to darken or lighten areas or even the whole photo, use the Burn / Dodge tools (hotkey - Latin O, switch between tools - Shift + O). Note two important settings: Range and Exposure. Range has three states: Shadows - the tool will be applied to dark areas, Highlights - to highlights, and Midtones - to neutral areas of the photo. "Exposure" is the strength of the tool, it is adjusted using the slider. For each situation, this value is selected separately, so experiment with this setting, but start with about 10-20%. Brightener can be used to whiten teeth, while Burner can be used to add contrast and volume to facial features.
Step 3
To retouch the image, use the "Stamp" (hotkey - S). With this tool selected, hold down alt="Image" and select the area of the photo you want to copy. Release alt="Image" and hover over the place you want to retouch, hold down the left mouse button and get down to business. Notice the two tool settings: Mode and Opacity. Using the "Mode" parameter, you define how the pixels interact, for example, in the "Darken" mode, the tool will replace only the light areas. The Opacity setting speaks for itself - the higher this parameter, the more noticeable the tool will work. With the help of the "Stamp" you can retouch bruises, wrinkles, folds, etc.
Step 4
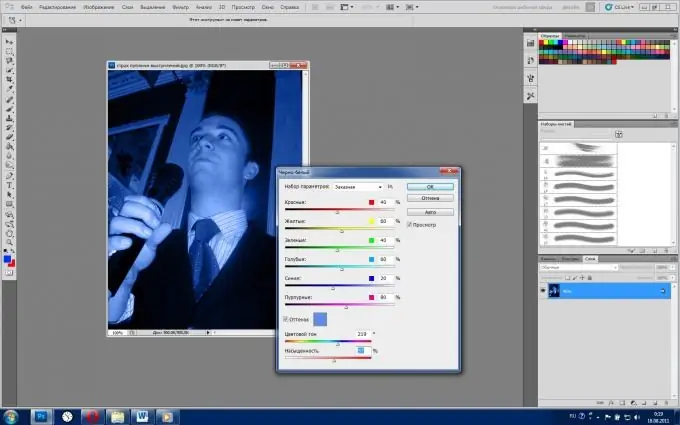
If you need to give your photo the effect of the distant 30-40s of the last century, use the "Black and White" tool. It can be activated in two ways: "Image"> "Adjustments"> "Black and White" or by hot keys Alt + Shift + Ctrl + B. In the window that appears, you will see several sliders responsible for six color groups. By changing their position, you affect the black and white display of each of them. Pay attention to the item "Tint", with which you can tint the photo in the color you need.
Step 5
To save the result, click File> Save As> select a path, select JPEG> Save in the File Type field.


