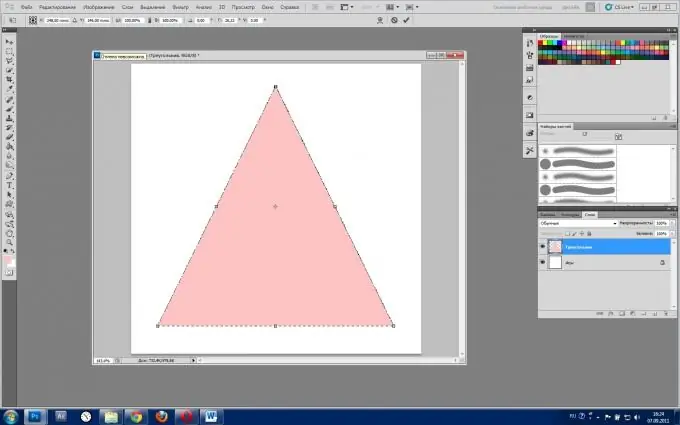
At first glance, there are no tools for creating a triangle in Adobe Photoshop CS5, but only at first. Even not quite a long acquaintance with the program will suggest several ways to solve this problem. We bring to your attention the simplest of them.

Necessary
Russified version of Adobe Photoshop CS5
Instructions
Step 1
Launch Adobe Photoshop CS5 and create a new document: click the "File" menu item, then "New" (or faster option - the keyboard shortcut Ctrl + N), in the "Height" and "Width" fields, specify, for example, 500 each, and click Create.
Step 2
Find the "Layers" panel, by default it is in the lower right corner of the program, and if it is not there, press F7. In the "Layers" tab, click the "Create a new layer" button (its icon is made in the form of a flipped paper sheet) and name it "Triangle". To rename a layer, double-click the left mouse button on its name, enter text from the keyboard and press Enter.
Step 3
Select the "Rectangular Marquee" tool (hotkey M, switch between adjacent elements Shift + M) and draw a square with it: hold down the left button somewhere in the upper left part of the workspace, drag the mouse to the lower right part and release the button. You will get a frame, the borders of which will look like "walking ants" - this is the selection area.
Step 4
If you want to paint over this area, activate the Fill tool (hotkey "G", toggle between adjacent tools - Shift + G), select a color (F6) and right-click inside the selection area.
Step 5
Click the "Edit" menu item and then "Free Transform" (shortcut Ctrl + T) to invoke the command to modify the object. Transformation handles - small transparent squares will appear in the corners and on each side of the rectangle. Right-click inside the selection area and select "Perspective" from the menu that appears. Click on the top left marker and drag it towards the middle of the top side of the square. Together with the left side of the rectangle, the right side will move to the center. The isosceles triangle is ready.
Step 6
To save the result, press the key combination Ctrl + Shift + S, select the path, change the file type to Jpeg, specify a name and click "Save".


