An operating system is the main software for a computer, without it it is impossible to fully use all the resources of a PC. If the system files are damaged, the computer may stop booting or may malfunction. There are several ways to restore the operating system.

Instructions
Step 1
Windows provides the ability to recover using the tools of the system itself. System Restore allows you to return your computer to a state where it was working without interruptions without losing your personal files (documents, pictures, favorites).
Step 2
To make recovery possible, the system monitors the changes made by the user and automatically creates restore points. You can only use this tool if it is enabled.
Step 3
Although System Restore is a handy feature, the area where the data needed to restore system files is stored is quite vulnerable to viruses, so some users disable it.
Step 4
To check if the System Restore tool is active on your computer, right-click on the “My Computer” item and select “Properties” in the context menu. Alternatively, open Control Panel from the Start menu and select the System icon from the Performance and Maintenance category.
Step 5
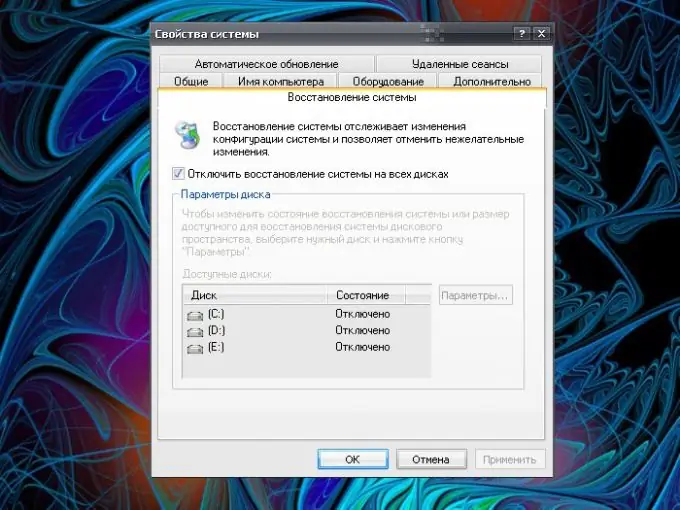
In the "System Properties" window that opens, go to the "System Restore" tab and make sure that the checkbox is not set in the "Disable System Restore on all disks" field. If necessary, make changes and apply the new settings.
Step 6
If you have enabled System Restore on a computer with damaged files, this time the tool will not help you get your PC back to normal operation. If it was enabled beforehand and created restore points (or you did it yourself), click the "Start" button and expand the program menu.
Step 7
In the "Accessories" folder, select the "System" section and invoke the "System Restore" tool. In the window that opens, set the marker in the "Restore an earlier state of the computer" field, specify a restore point and follow the instructions of the restore wizard.
Step 8
If System Restore has been disabled, or the system does not boot when you turn on the computer, use the installation disc. Insert it into your floppy drive, restart your computer and press the F8 key. Select "System Restore" from the list of available tasks. Wait until the operations are complete without shutting down or restarting the computer without the instructions of the installer.


