The developers of the Windows operating system are constantly improving the means of personalizing the user interface. Choose from window and control styles, color and sound schemes, and mouse cursor schemes to meet the needs of virtually any user. However, some changes, for example, changing the welcome window, will not be possible by standard means.

It is necessary
- - Free Resource Hacker, available for download at rpi.net.au/~ajohnson/resourcehacker;
- - the right to change the register.
Instructions
Step 1
Make a copy of the logonui.exe file located in the System32 subdirectory of the operating system installation directory. Use Explorer or any file manager. Change to the specified directory. Find the logonui.exe file and copy it to the same directory, but under a different name. Remember this name.
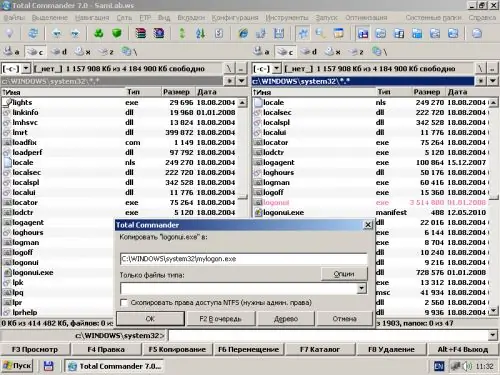
Step 2
Open the module that is a copy of logonui.exe in Resource Hacker. Press the key combination Ctrl + O or select the File and Open… items in the main application menu. In the file open dialog, change the directory to the one where the executable module was placed, which is a copy of logonui.exe. Find the file in the list and highlight it. Click the "Open" button.
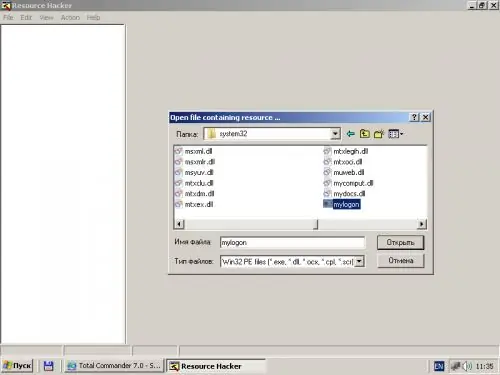
Step 3
Change the colors, styles, placement, and font settings of the Windows XP Welcome interface elements. In the left pane of Resource Hacker, expand the resource tree node named UIFILE. Expand the child node and select the element it contains. A multi-line text editor with the text of the configuration file is displayed in the right pane. Explore the downloaded data. Their format is intuitive, and the names of the identifiers directly indicate the elements of the interface.
Correct the values of the configuration parameters. Click the Compile Script button above the text editor.
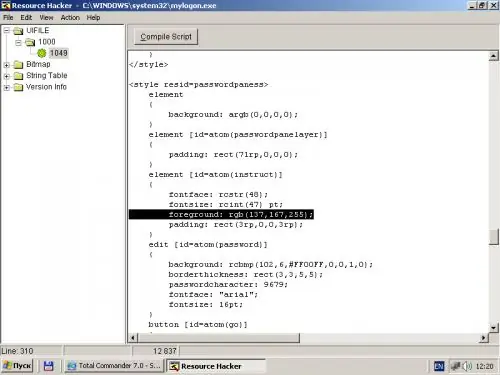
Step 4
Find the images used by the welcome window that you want to change. Expand the Bitmap tree node in the left pane of Resource Hacker. Expand the child nodes of this section and select the elements they contain. Images loaded from resources with corresponding identifiers will be displayed in the right pane of the program. Remember resource IDs.
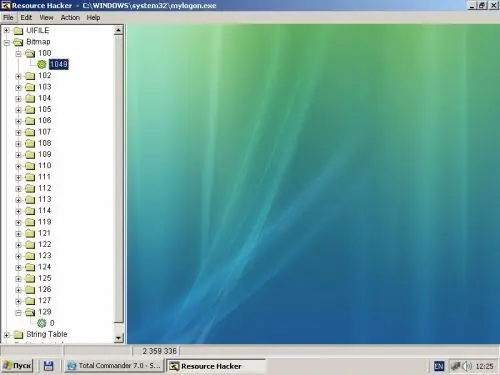
Step 5
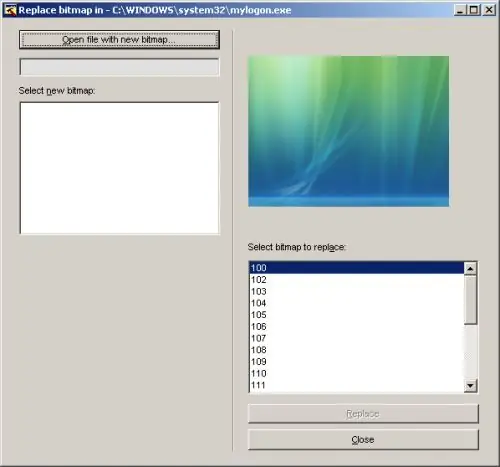
Change the images used by the XP Welcome window. Select one of the elements corresponding to the image resources in the Bitmap section. Select Action and Replace Bitmap… from the menu. In the Replace bitmap in dialog that appears, click the "Open file with new bitmap …" button. Specify a bmp file with a new image. Click the "Open" button. Click the Replace button.
Step 6
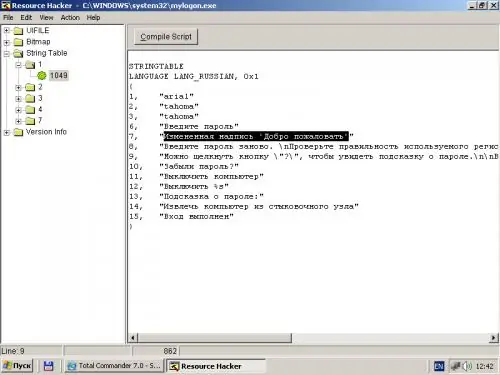
Modify the XP Welcome window to correct the text labels used in it. Open the String Table section in the left pane of Resource Hacker. Expand the child nodes of this section and view the row tables by highlighting the items they contain. Change the items you want in the right pane. Click the Compile Script button. Save all changes by pressing Ctrl + S.
Step 7
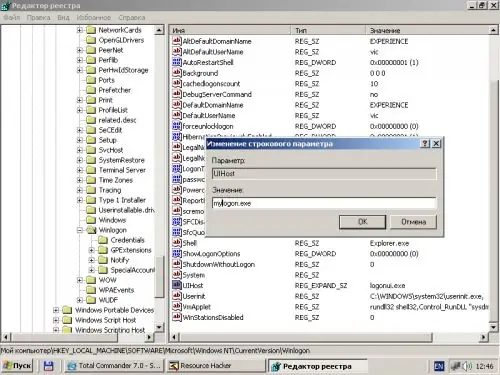
Modify the Windows registry so that a fixed copy of logonui.exe runs as the welcome application. Launch the Registry Editor by selecting Run from the Start menu, entering regedit in the dialog box that appears, and clicking OK.
Open the HKEY_LOCAL_MACHINE / SOFTWARE / Microsoft / Windows NT / CurrentVersion / Winlogon registry key by expanding the corresponding registry nodes and highlighting the latter. Start changing the value named UIHost. Click on the element with the given name in the list in the right panel of the application. The "Change string parameter" dialog will open. In the "Value" field of this dialog, enter the name of the file created in the first step. Click OK.
Step 8
Check the results. Reboot your computer. The revised welcome window will be displayed.


