Many of us communicate with our friends, acquaintances, colleagues and even distant relatives on various social networks. In order to distinguish your page from thousands of others, you can put not one ordinary photo on your avatar, but a cut from your favorite images. This is very easy to do with the usual Paint program.

It is necessary
Paint program, photos
Instructions
Step 1
We select the photos from which we will make a cut. Photos can be of different sizes.
Step 2
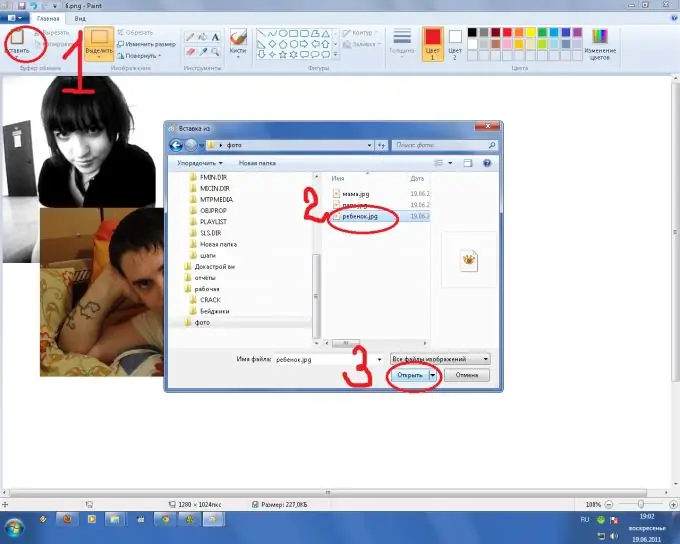
Open Paint and load the first photo into it. To do this, look for the "insert" button and select "insert from"
Step 3
Click on "insert from", an explorer opens, in which we indicate the photo that we want to insert.
Step 4
To the resulting photo in Paint, insert the following photo in the same way.
Step 5
Select a photo and click open
Step 6
We get 2 photos of different sizes. In order for them to be approximately the same, click "resize" and indicate how much to change it:
Step 7
We arrange the photos as we like and insert the third photo

Step 8
if necessary, crop the upper part of the photo - for this, press "select", select the unnecessary area and press Delete
Step 9
Drag the photo to the other two - press "select", select the photo (without touching the white space!) And move the mouse in the desired direction
Step 10
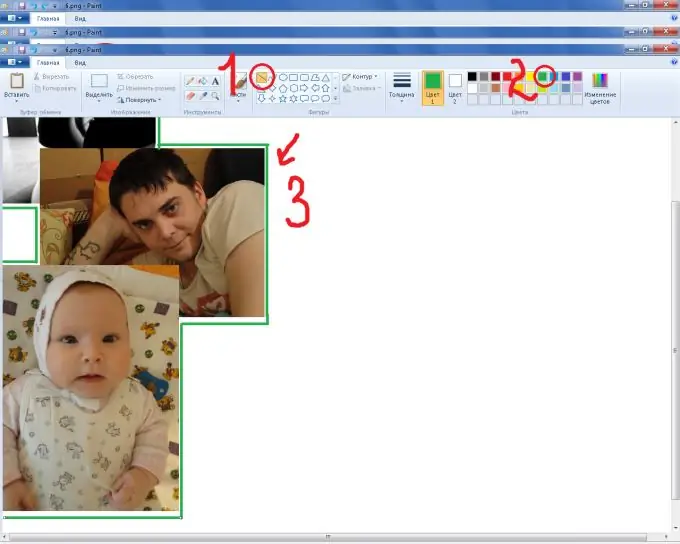
Three photographs are located one below the other. We can make a frame for photos - click on the image of a straight line, select the color of the frame and draw

Step 11
For beauty, in the same way, we make another frame - a little thicker than the first and a different color.
Step 12
Now select the background - click on the paint bucket, look for the desired color and fill all the white space with it
Step 13
The space between the frames can be filled with a different color - for beauty
Step 14
Now we give the shape to our avatar - in the lower right corner of the picture we are looking for the end of the sheet - a small square, click on it and reduce the picture to the size we need, cutting off all the unnecessary background.
Step 15
The finished avatar can be decorated using various tools - for example, a spray bottle. To do this, click on the "brushes", select the "spray" and draw
Step 16
We decorate with the help of various shapes, for example - stars
Step 17
We upload the finished avatar to the site and let everyone envy such beauty =)


