Microsoft Windows XP operating systems do not have programs for writing images to optical discs by default. To solve this problem, just download the necessary utility from the Internet and install it. This can be done with a few clicks.

Necessary
- - the Internet;
- - operating system Windows XP;
- - CD burning program InfraRecorder.
Instructions
Step 1
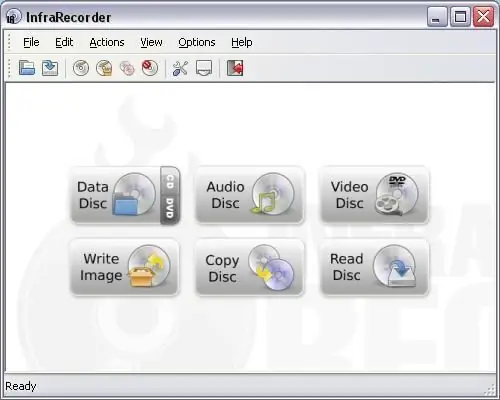
Download and install the program. In order to burn an image to a disc, you first need to download an optical disc burning program, for example, InfraRecorder, which is distributed free of charge. To do this, go to https://infrarecorder.org/ (Downloads section) and select the appropriate setup file. After downloading the resulting file to your computer, you need to run it. Then follow the instructions of the installer. After installation, a corresponding launch shortcut will appear on the desktop. Run the program.

Step 2
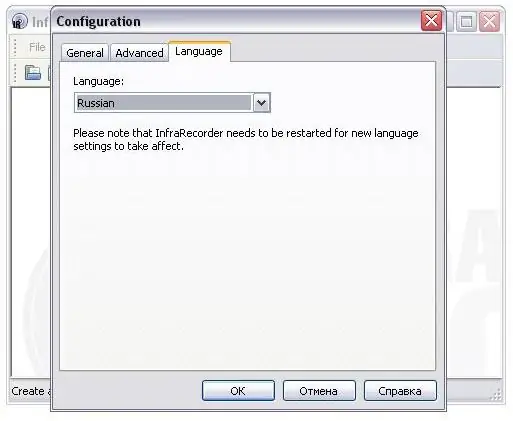
Change the interface language. By default, the program uses English. However, it is much more convenient to use it with the Russian interface. To do this, select "Options", "Configuration …" in the main menu of the program. In the window that appears, go to the "Language" tab and select "Russian". Confirm your selection by clicking the "OK" button at the bottom of the window. After that, the program must be restarted (closed and opened again). The next time you start it, the Russian language will be used.

Step 3
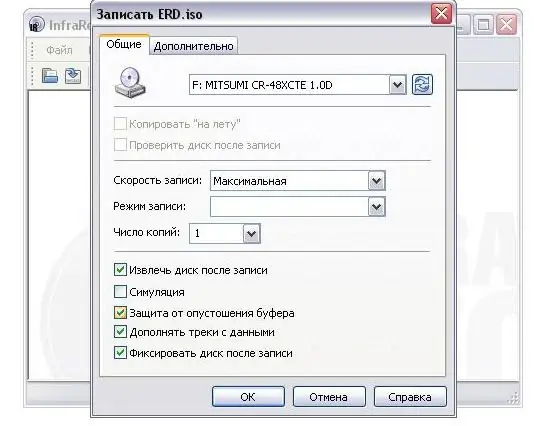
Select an image and run. To do this, in the main menu, open "Actions", "Burn image" and you will see a window for selecting a file-image. After selecting it in a new window, if desired, you can change the recording settings, including mode, speed, etc. Press the "OK" button to start the operation.

Step 4
Wait for the end of the recording. During the write operation to disk, a window with the current progress will be displayed. Please note that it can take a long time to complete while the selected image is written to disk. It depends on its size and permissible speed. At the end of the recording, the program will tell you "Completed: 100%". The disc is burned.


