Often, video filmed with amateur digital cameras turns out to be excessively dark. This can happen as a result of choosing the wrong shooting mode, and a banal lack of lighting. With the help of processing in a specialized program, such a video can be made lighter.

Necessary
is a VirtualDub video editor available for free on virtualdub.org
Instructions
Step 1
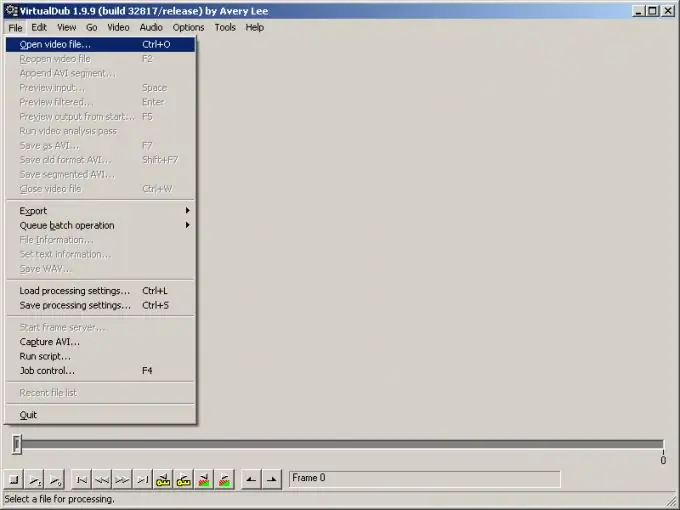
Open the video file you want to lighten in VirtualDub. Use the keyboard shortcut Ctrl + O or select File and then "Open video file …" from the main menu. Go to the directory with the video file, select it and click the "Open" button.
Step 2
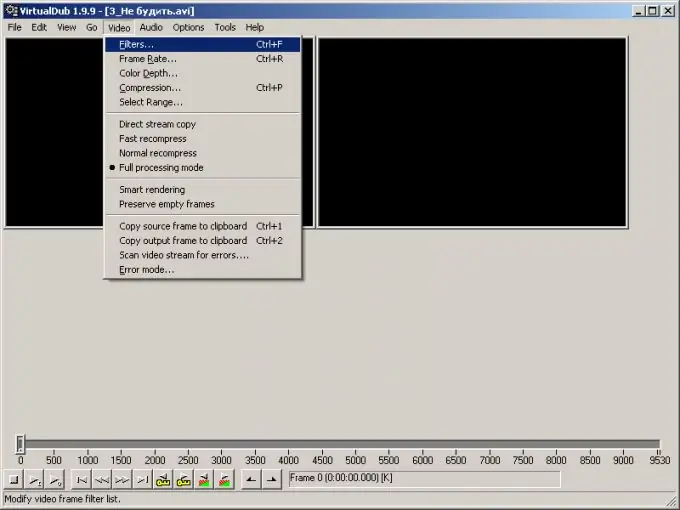
Open the dialog for managing filters used when processing a video stream. Select Video and "Filters…" from the menu. You can also press Ctrl + F.
Step 3
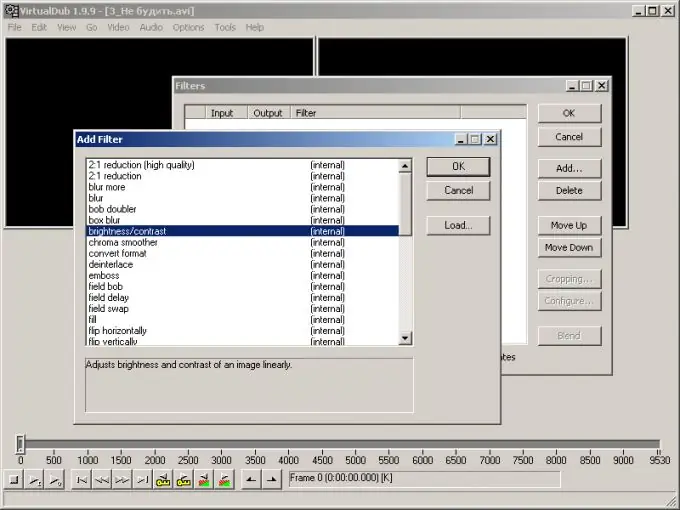
Add a filter to change the brightness and contrast of the frames. Click on the "Add …" button. In the list of the Add Filter dialog that appears, highlight the brightness / contrast item. Click OK. The dialog for configuring filter parameters will be displayed automatically.
Step 4
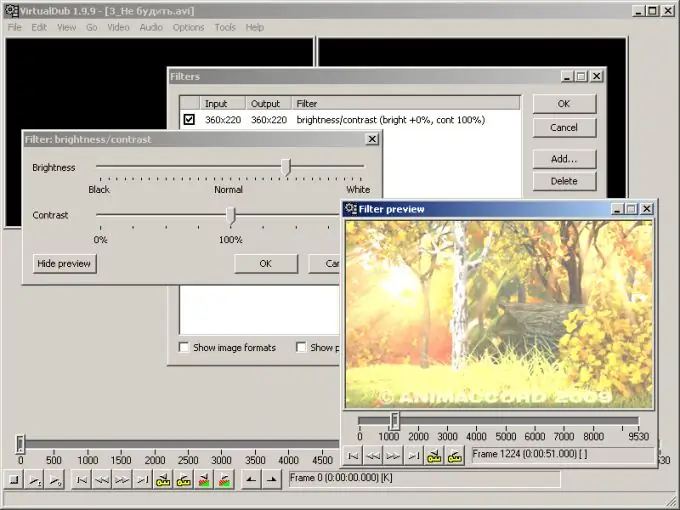
Make your video lighter. In the "Filter: brightness / contrast" dialog, click the Show preview button. The Filter preview will be displayed. Using the slider and control buttons in this window, go to the viewing of a frame in order to control the degree of changes made. In the filter settings dialog, move the Brightness slider to the right until the image in the preview window is bright enough.
Step 5
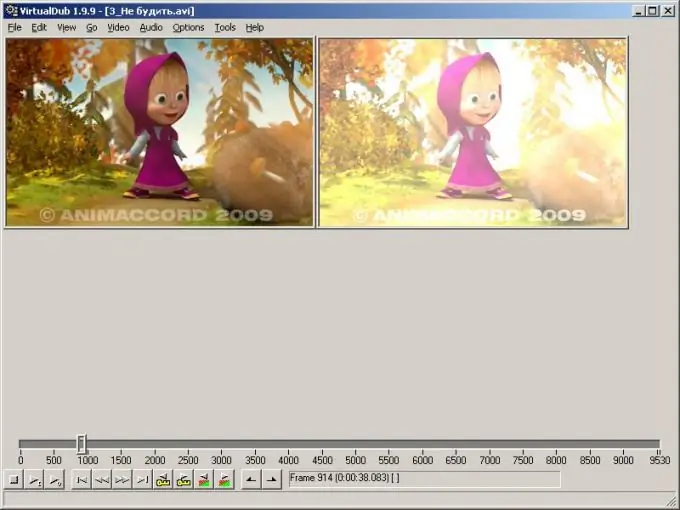
Check the correctness of the set parameters of the filter. Browse the different sections of the video in the main VirtualDub window. Make sure you are happy with the result.
Step 6
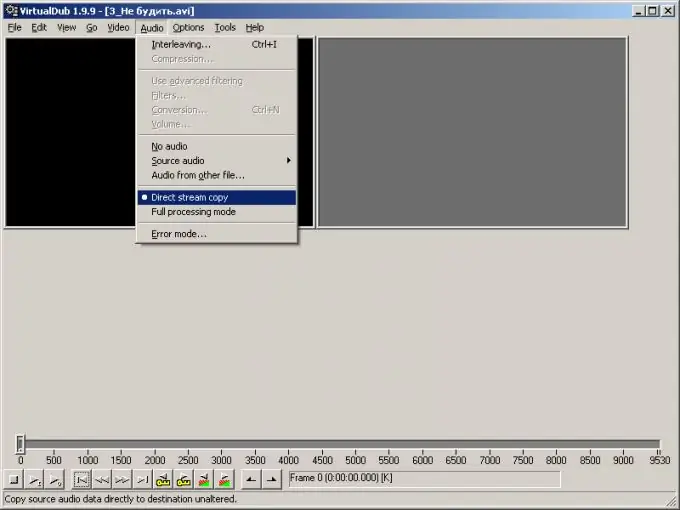
Turn on the audio stream copying mode. Set the marker to Direct stream copy in the Audio section of the main menu.
Step 7
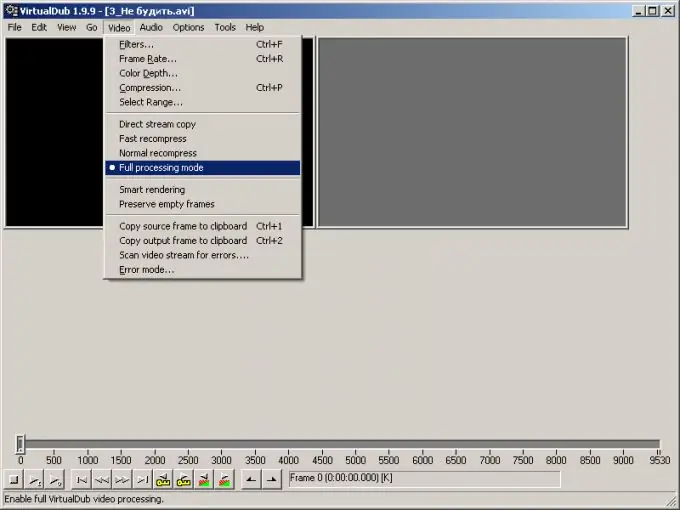
Select the full video processing mode. Check the Full processing mode item in the Video section of the main menu.
Step 8
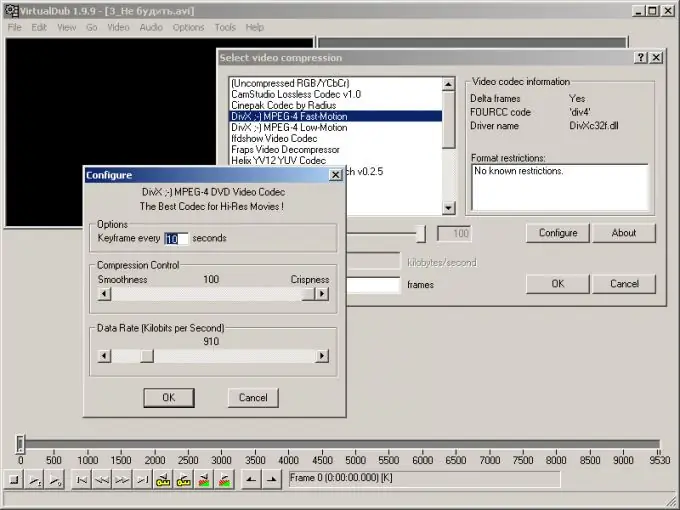
Select and configure a video stream encoder. Press Ctrl + P or use the Video and Compression… menu items to display the Select video compression dialog. Select the desired codec in it. Click the "Configure …" button to select the compression rate and other options. Click the OK buttons in all open dialogs.
Step 9
Create a lighter version of the video. Press the F7 key or select File and "Save as AVI …" from the main menu of the application. Specify a name and directory to save the file in the displayed dialog. Click "Save". Wait for the end of the video encoding process.


