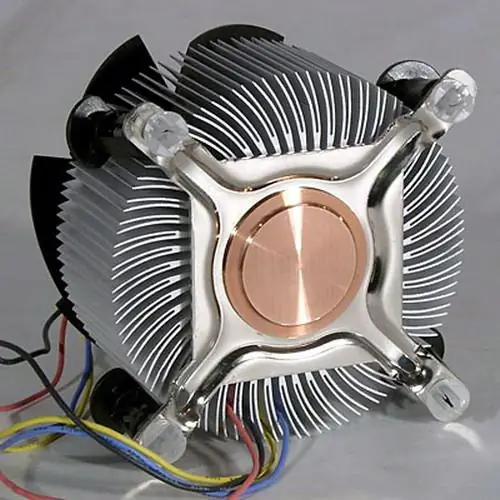
It often happens that the power of the computer is not enough. The easiest way to solve the problem in this case is to replace the processor. But to replace it, you cannot do without dismantling and installing the CPU cooler. A cooler is a processor cooling system that includes a fan and a heatsink. The cooler mounting operation is simple, but requires some skill. There are several types of cooler mounts, but the most popular are Intel processors with socket 775.

Necessary
- - Computer;
- - Intel processor with socket 775;
- - cooler for socket 775;
- - thermal grease.
Instructions
Step 1
If you have not yet installed the processor in the socket, install it. To do this, open the shutter and lift it so that it is at a 90 degree angle to the processor socket. Then carefully install it, making sure that the protrusions along the contour of the socket coincide with the notches on the processor. After that, secure the processor by lowering the shutter, it should click into place.
Step 2
Note that it is not necessary to apply thermal grease to the processor as it is already applied to the back of the heatsink. However, it is worth noting that it is not always of high quality. To improve cooling, apply a layer of your thermal paste. You can use Alsil-3 or Titan thermal paste. Wipe off the factory thermal grease from the base of the cooler before applying. It is better to do this with a soft dry cloth. Then gently apply a thin layer of new thermal grease to the processor cover. It should cover the entire surface, but make sure that the thermal grease does not get on the contact pads.
Step 3
Now you can install the cooling system, that is, the cooler. This requires a standard boxed Socket 775 cooler supplied in the boxed version of the processor. The cooler has four mounts. Place the cooler on the socket in such a way that the fasteners line up with the holes on the socket. Press down gently on each latch. You can start with any, just make sure that the sequence is diagonally. After pressing all four latches, flip the motherboard upside down and carefully observe the correct installation of the fasteners. If everything is fine, the final stage will remain - connecting to the power fan.
Step 4
To do this, look on the motherboard for a small white connector labeled CPU FAN. It should be near the processor socket. Connect the connector coming from the cooler there.


