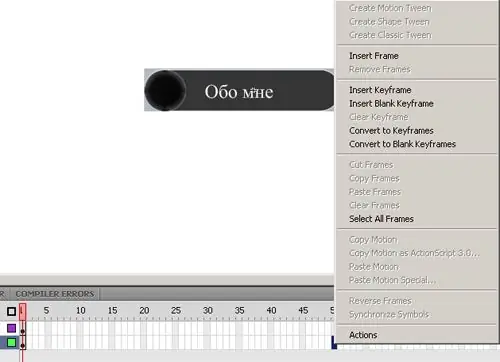
Flash technologies are ubiquitous in Internet sites today, and even aspiring webmasters are striving to add flash elements to their site. For example, the menu design using this technology will be functional and beautiful. As an example, we will describe how to make a convenient flash button in Adobe Flash CS4 that can be placed on your site and make a menu block based on such buttons.

Instructions
Step 1
Prepare two graphic files with a background image of buttons without text in.
Step 2
Open the settings section and set the width to 273 pixels and the height to 54 pixels. Click the Import button on the File menu and choose Import to library to import the two rendered images into the data library.
Step 3
Drag the downloaded pictures to the work area, press F8, rename one of the pictures and in the Type section select Movie Clip.
Step 4
Then drag the second picture to the work area, rename it too and specify the same parameter in the Type section.
Step 5
On each button, type the text you want and press Ctrl + F8 to create a new button. The New Symbol window will open. Give the name of the future button and choose the Button type. Copy the first edited picture above to the work area of the created Movie clip button.
Step 6
Create a new Movie Clip, also pressing Ctrl + F8, and copy the resulting to the work area. Create a new layer and copy the Movie Clip with the second image.
Step 7
On the first layer, create a frame by stepping back a bit and choosing the Insert Frame option from the right-click menu. Repeat the same on the next layer by choosing Insert Key Frame from the context menu. Select the created keyframe and open its settings.
Step 8
In the Color Effect section, select Style Alpha and set the value to 0%. In the first frame of the same layer, set the value to Classic Motion Tween.
Step 9
On the Stage, select the button object and open Actions. Paste the following code into the free field: on (release) {
getURL ("aboutme.htm", "_self", "GET");
}
Step 10
In the settings, give the button the desired name. Go back to the first scene and copy the movie clip, select it and open Actions again. Enter another code where sim_btn is the name of your button: onClipEvent (enterFrame) {
if (go) {
nextFrame ();
} else {
prevFrame ();
}
}
onClipEvent (load) {
var go;
stop ();
sim_btn.onRollOver = function () {
go = true;
};
sim_btn.onRollOut = function () {
go = false;
};
}
Step 11
Export the button by choosing Export movie from the File menu.


