Probably every user knows that RAM is one of the most important components of a PC. Unfortunately, it often happens that RAM (as it is called otherwise, the RAM) fails at the most inopportune moment, so any computer owner will need information on how to view the computer memory in Windows 7, as well as to carry out at least elementary diagnostics of it.

RAM physical location
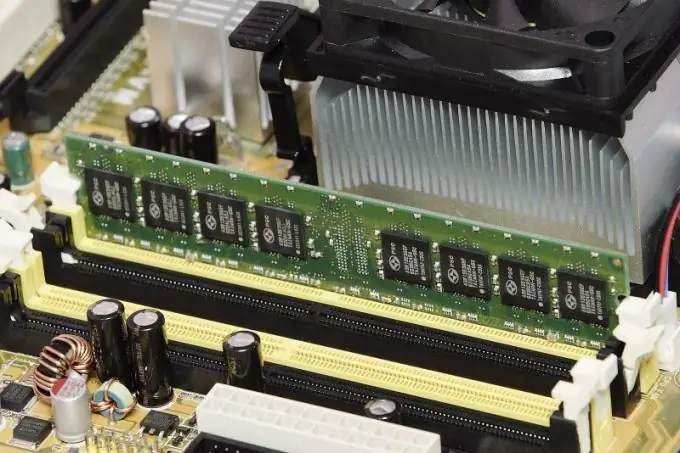
Physically, RAM is a small printed circuit board that houses several microcircuits. All this is called a RAM module. On one of its edges there are contacts that are installed in a special connector on the motherboard. It happens that during operation, the memory stick, so to speak, leaves, that is, its fastening weakens. There is also another problem - contact oxidation. Therefore, if problems arise with loading the PC, first of all, it is necessary to revise the memory modules.
To get to the RAM, you need to follow these steps. Lay the system unit on its side and remove the fastening screws that hold the cover. After that, slide it and open the case so that you can see its internal structure, namely the motherboard and the components installed on it. Find the memory sticks. Usually there are 1-2 of them, and they are marked with the inscription RAM indicating the type and amount of RAM. Disconnect the latches that secure the modules and pull them out of the connector. Look at the specified characteristics. Clean the contacts of the module with a regular eraser, then blow off the remaining rubber.
Install the module (s) back onto the motherboard, applying slight pressure until they click into place. Correct installation is guaranteed by a special groove on the rib with contacts. After that, you can install the cover on the system unit and screw it back with screws.
Windows 7 RAM Checker Software
To ensure that RAM does not fail unexpectedly or when problems are detected, it is recommended that you perform memory diagnostics. The easiest way to do this is using standard tools that are available in the operating system itself. There are many ways to get started with these tools.
Follow the steps below. Open the Start menu and type mdsched.exe in the search text box below, then press Enter. A pop-up window will appear on the screen in which you need to select an action - restart and start checking, or do it the next time you turn on the PC. Choose the option that best suits your needs.
The next time you boot, a screen will be displayed showing the verification progress and the number of steps. If errors are found, the system will try to fix them. If there are no errors, then the RAM is working properly. In this case, if there are problems in the operation of the PC, you will have to look for their cause in other hardware or software components of the computer.


