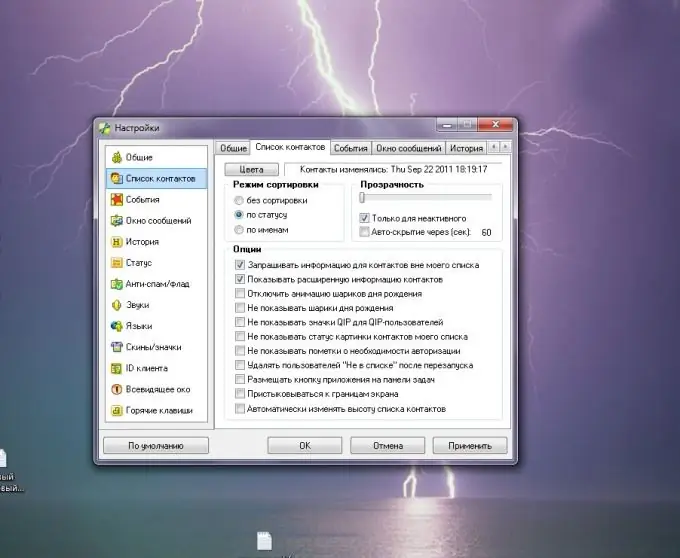
"Kip" or QIP is a program that allows you to communicate online by sending messages. Unlike similar programs, this messenger has gained popularity among users who prefer a simple interface, not overloaded with ads and unnecessary information. In addition to the listed advantages, the user has the opportunity to make the program more convenient by experimenting with certain settings.

Necessary
- QIP program;
- QIP account.
Instructions
Step 1
If, after installing the program, you have a need to change the interface language, do it in the “Settings” menu item of the same name. Select your preferred language from the top drop-down menu and click OK.
Step 2
When registering in QIP, users often choose one of their nicknames as a name. If your friend introduced himself by a name that is not familiar to you, you can change his name to a more convenient one for you. These changes will only be visible in your account. Right-click on the desired contact in the list and select "Rename contact". In the edit field, enter a new name for the contact.
Step 3
The classic appearance of the program can be changed for more interesting design options. To do this, download the skin you like from qip.ru. Then copy it to the "Skins" folder of the program. Select the downloaded skin in the "Skins / Icons" settings menu. After you apply it, you should turn off the program and start it again.
Step 4
Each QIP user can set his personal picture in his personal settings. The selected avatar will be displayed when communicating with the interlocutor in the message window. Find a suitable square image with a side length of 15 to 64 pixels. The maximum avatar size is 7168 bytes. Select the main menu item with the words "Change my details". In the left part of the window that appears, activate the inscription "Load icon". Select the desired picture and confirm your choice by clicking the "Save" button.
Step 5
By default, the client of the program saves the history of correspondence in one of its files. You can completely disable this option or change the location of saving the files with messages. To do this, there is a sub-item "History" in the "Settings" menu. By unchecking the boxes opposite the corresponding lines, you will change the settings for saving history.
Step 6
In the installed program, the ability to transfer files is initially disabled. You can enable it by following these steps. Open the "General" tab in the program settings. In the lower part of the window, check the box next to the inscription "Enable file transfer." In the pop-up window, select "Yes" and confirm your choice with the "Apply" button.
Step 7
The program has the ability to make the window semi-transparent. The item "Contact list" is responsible for this setting. By changing the position of the slider under the word "Transparency", you can fully develop the QIP window or make it almost invisible on the desktop.
Step 8
Often, in addition to messages from your friends, you receive spam. You can protect yourself from unwanted mail by enabling the "Anti-spam" function in the settings tab of the same name. Anti-Spam allows you to choose who you want to receive messages from. From all users or only from those on your list.


