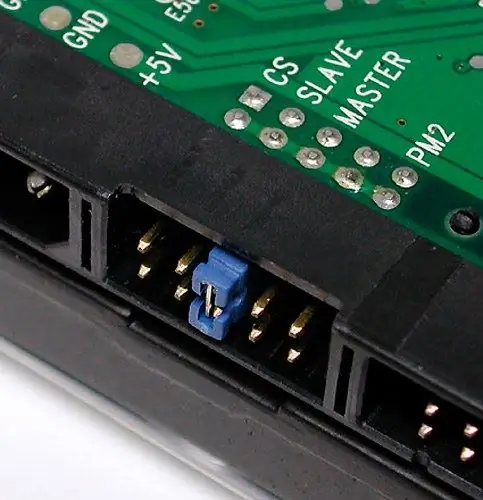
Today, it is not so common to connect peripheral computer devices (optical drives and hard drives) via the parallel IDE (Integrated Drive Electronics) interface. Perhaps that is why the question of how to change the settings of the master / slave devices connected via one IDE cable has come up more often. For this interface, in contrast to the more modern SATA, it matters which device should be polled first (master), and which should be polled second (slave).

Instructions
Step 1
Turn off the computer and unplug the power cord from the computer. If the power supply installed in your system unit has a separate power switch, then you can do without turning off the power supply with it.
Step 2
Remove the left (from the front side) panel of the case of the system unit. You need to gain free access to the device whose settings you want to change - you may need to disconnect all the wires on the back of the system unit and move it to free space for this. To remove the side panel of the case, it is usually enough to unscrew the two screws securing it to the rear panel and then slide it back a little.
Step 3
Disconnect the power bus and data cable from the device you are interested in - the hard disk or optical drive. The switch you need is located in a recess on the back surface of the device, and you will hardly be able to change the position of the jumper without disconnecting these cables.
Step 4
Determine which jumper position matches the one you want (master or slave). As a rule, information about this is present on the case of the device itself, and if it is not there, then you will have to use the information materials of the purchased device or find this information on the Internet.
Step 5
Remove the jumper and install it in the desired position. It is convenient to do this with tweezers, since the dimensions of the jumper itself are very small, and access to the pins is difficult.
Step 6
Do a similar operation with the second device, if necessary - the jumper of only one device on this loop can be in the master position, and any other must be set to the slave position.
Step 7
Replace the power and data wires of the devices inside the computer case, reinstall the side surface of the system unit, connect all the wires on the back panel. Connect the network cable last, remember to turn on the power switch and boot your computer.


