Very often, digital noise appears in photographs taken in low light levels. Of course, ideally, you need to use additional lighting when shooting, but in some cases, you can save noisy images by applying special filters to remove noise.

Necessary
- Photoshop program
- Imagenomic Noiseware Professional Plugin
- Photo for processing
Instructions
Step 1
Open the photo in Photoshop using the Open command on the File menu, or by pressing Ctrl + O. In the explorer window that appears, select the required file and click the "Open" button.
Step 2
Duplicate the layer in the open document. To do this, position the cursor on a single layer in the Layers palette ("Layers") and right-click. In the context menu that appears after this simple action, select the Dublicate layer command.
Step 3
Run the Imagenomic Noiseware Professional plugin. When installed by default, this plugin is placed in the Imagenomic folder and invoked via the Imagenomic item in the Filter menu.
Step 4
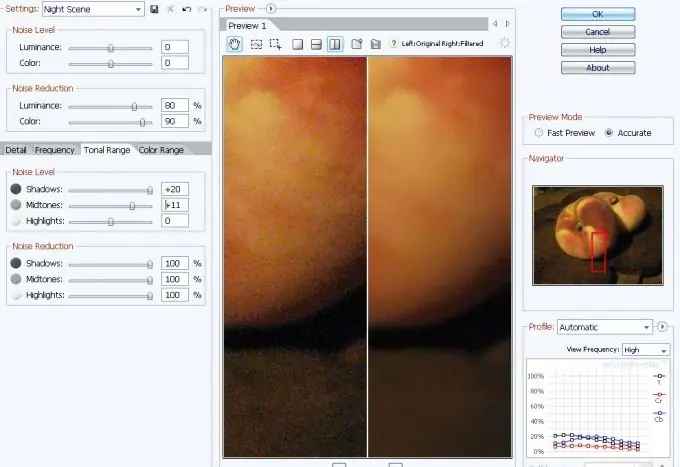
Adjust the filter. Noiseware Professional has the ability to use ready-made presets and user settings. First, try applying any of the presets from the Settings drop-down list at the top left of the filter window to your photo. You can see the result of applying a preset in the filter window. Compare the results of applying different settings by opening several previews. To do this, right-click on the triangle button next to the word Preview at the top of the filter window and select the New Preview command. Apply several different presets and compare the results. For more precise manual filter adjustment, switch to manual mode by switching Profile from Automatic to Manual in the lower right corner of the window.
Step 5
Left-click on the Multiple Regions Selection Tool at the top of the filter window. Use this tool to select several areas of high noise in the preview window. Click on the Tonal Range tab. By moving the sliders, indicate in which areas the maximum amount of noise is contained and in which areas this noise should be removed. You can immediately evaluate the result of applying the settings in the preview window. Click on the Color Range tab and specify the same for different colors. If the digital noise in the image is green, yellow, or blue, set these colors to the maximum noise reduction level. Click the Detail tab and adjust the overall noise reduction and detail preservation level. In the Detail Enhancement field, adjust the sharpness and contrast using the sliders. The result of applying the settings will be visible in the "Preview" window.
Step 6
Apply the filter by clicking OK.
Step 7
Change the opacity of the layer to which the filter was applied, to achieve the optimal combination of the original image and the results of the filter. You can change the opacity of a layer using the Opacity slider at the top of the Layers panel.
Step 8
Save the processed image with a different name from the original file using the Save As command on the File menu.


