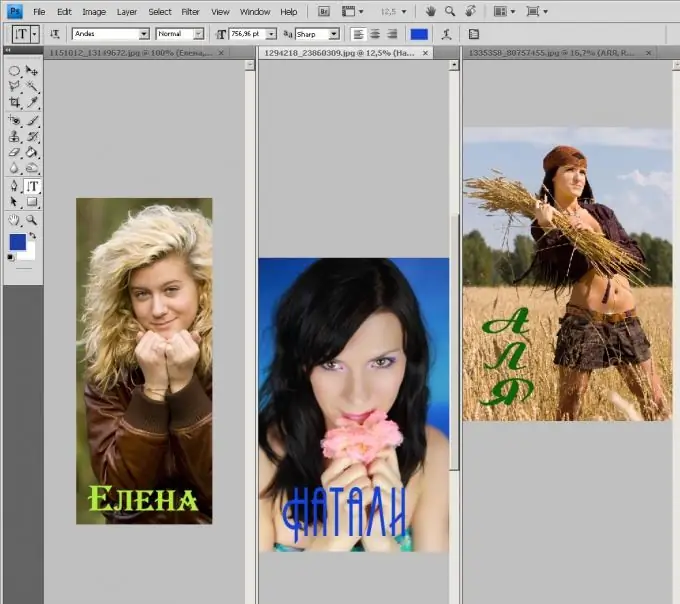
If you want to add your name to a photo or avatar for social networks, you can do it in any graphics editor that has the “Text” tool. Using it, you can type a name in a separate layer, choose a suitable font, color, size for it. In this example, the editor Adobe Photoshop will be considered, but in most such programs, the principle of operation of this tool is similar.

Necessary
Adobe photoshop
Instructions
Step 1
Open the future avatar in a graphic editor. If necessary, crop it in proportions suitable for your social network using the tool “Crop” (Crop). Using the same tool, you can immediately set the desired size and resolution. For example, the size of the car park for the VKontakte social network is 200 × 482.
Step 2
Select the Text tool from the toolbar. It can be vertical or horizontal, depending on how you want the name to appear in the photo. Look at the tool preferences panel at the top of the window. Find a list of the fonts on your computer there. Choose a font that you like.
Step 3
Click once with the text on picture tool where you would like to place your name. You will see a blinking cursor in the picture.
Type in the name. Of course, it won't immediately look exactly the way you envisioned it. To do this, you need to choose the color and size you need.
Step 4
Highlight the name with the cursor. Select the desired font size value in the settings panel, for example 48 pt.
Step 5
Click on the colored square in the settings panel and choose a font color that will look good on your photo.
Step 6
Open the "Layers" palette. You can do this by pressing the F7 key. You will see two layers: a background layer with a photo and a text layer with a name. The text layer can be distinguished by the icon with the letter “T”. Select it by clicking on it once with the mouse.
Step 7
Select the “Move tool”. It is the first from the top on the toolbar, looks like an arrow with a cross. Move the text layer with it, positioning the name in such a way that it looks better. Using the same tool, you can scale the layer, make the inscription larger or smaller by pulling on the corners or edges. But this requires that the “Show transform controls” option be checked in the tool settings panel.
Step 8
As soon as the inscription on the avatar suits you, save the picture using the “File - Save for Web and Devices” menu item. In order for the picture to look the best on the web while being lightweight, it is recommended to select the “jpeg” file format and “High” quality.


