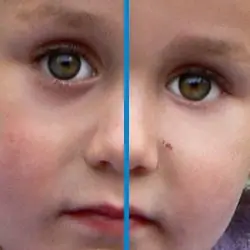
One of the important tasks solved during photo retouching is the elimination of nuances and defects that negatively affect the appearance of a photo model. As a rule, these are problems associated with the color and condition of the skin.

Necessary
- -computer with Photoshop;
- - restlessness
Instructions
Step 1
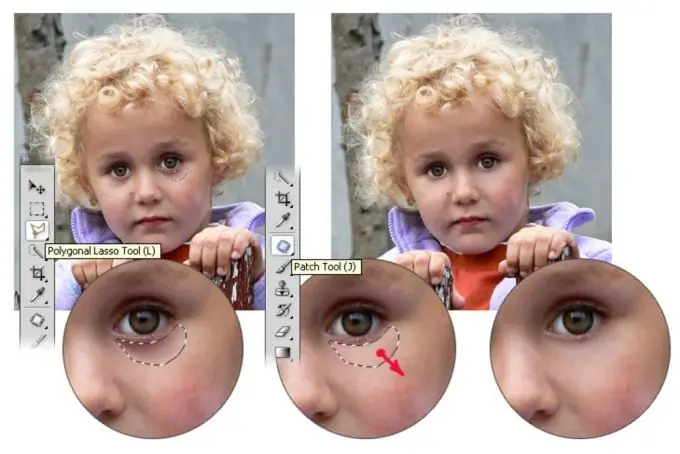
To eliminate skin imperfections, the Patch Tool of the Adobe Photoshop program is very convenient. To remove unpleasant folds and bruises under the eyes, do the following: Open the digital image file.
Step 2
Using the Polygonal Lasso tool, select the area under the eyes, approximately as shown in the diagram. Thus, we will indicate which site will be subject to changes.
Step 3
Select the Patch Tool. Place the cursor in the middle of the selected area and, without releasing the mouse button, gently drag the image. Thus, you will be able to choose a “donor site, the color and texture from which will take the place of the area that seems undesirable to us. As a rule, you do not have to move far in search of the desired fragment - a site located in the vicinity of the selected zone is quite suitable.
Step 4
Release the mouse button. The program will automatically “implant” the skin area, adjusting its edges to the new location.

Step 5
If the result is you, for some reason? not satisfied, you can press the Ctrl + Z combination on the keyboard, or select the Undo command from the Edit menu. After that, you can try again to select the “donor” site and the “patient site”.
Step 6
If you are satisfied with the result of the last operation, it can be repeated for other parts of the face and areas where you found undesirable effects - this can also remove not only bruises, but also glare from a flash, minor skin imperfections, etc.
Step 7
When you are finished working on the image, save it with the Save As command from the File menu. It must be remembered that it is better to save the edited image with a different name or in another place in order to leave the source untouched just in case - no one is immune from an error and, perhaps, later on you will need to return to editing the original source, and it will be very offensive. if it is destroyed without a trace by later copies and modifications.


