Adobe Audition is a common and convenient audio editor that allows you to change various characteristics of sound in digital recordings. One of the well-implemented features in Audition is noise reduction.

Necessary
Computer with Adobe Audition installed, audio file
Instructions
Step 1
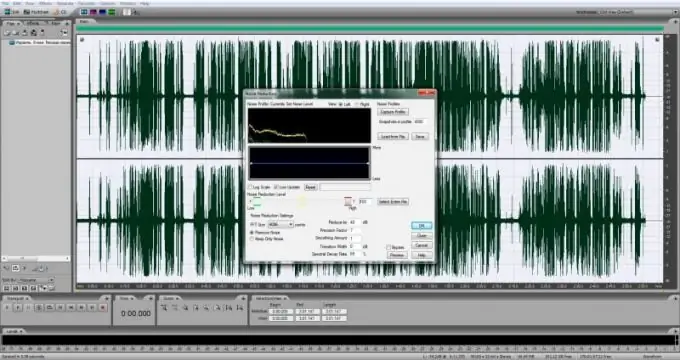
The program has a whole group of tools for restoring phonograms and eliminating unnecessary noise. They are located in the Restoration tab. There is almost a complete set for the restoration of the recording. The most useful feature for removing background noise is Noise Reduction (Process). To get started with Noise Reduction, you first need to create a noise profile. If possible, you need to select a piece of audio file that contains only noise without a useful signal. Having selected it with the mouse, you need to go to the Restoration tab and select the Capture Noise Reduction Profile item. The selected fragment will be accepted by the system as the reference noise for the file.
Step 2
After that, you can go directly to the Noise Reduction effect. To do this, select the entire area of the file where you want to eliminate noise and select Noise Reduction (Process) in the Restoration tab. A window will open where you can configure the squelch profile. To do this, the instrument provides a Low / High slider and a screen with an equalizer, which allow you to adjust the noise profile so that the useful signal is not affected by noise reduction. You can check whether the cleaning from noise affects the useful signal by moving the checkbox from the Remove Noise line to Keep Only Noise. If, with this position of the flag, not only noise is heard, but also part of the useful signal, the parameters must be adjusted. You can listen to the result using the Preview button at the bottom of the window.
Step 3
Another useful feature in Adobe Audition is Adaptive Noise Reduction. It is applicable to such files that do not have a clean noise profile, that is, areas without a useful signal, containing only background noise. Noise reduction in Adaptive Noise Reduction is controlled by several sliders that allow you to adjust various parameters. The tool is not as convenient and simple as the previous one; certain professional skills are required when working with it. However, with its help it is possible to suppress some of the noises that the noise profile correction cannot cope with.
Step 4
Another tool - Click / Pop Eliminator - is useful when digitizing phonograph records. It can be used to remove clicks and pops from the soundtrack. To do this, select a section of the sound wave where there are artifacts in the form of sharp short peaks, and select Click / Pop Eliminator in the Restoration tab. After opening the tool window, the easiest way to get rid of the clicks is to press the Auto Find All Levels and Find Single Click Now buttons. It should be borne in mind that each click when working with the instrument is best selected separately in order to reduce the loss of the useful signal.


