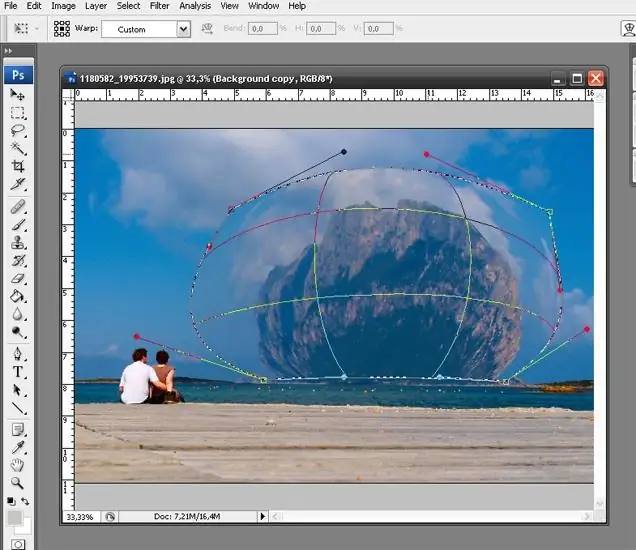
Transform is a handy Photoshop feature that includes a whole arsenal of tools that change the shape of a selected object. The transformation can be applied to the entire image and to its fragment.

Necessary
- - Adobe Photoshop program
- - Photo
Instructions
Step 1
Open any photo or picture in Photoshop. Select the object you would like to transform. Before you can change an object, you need to select it. The selection is made with one of the variants of the Marquee Tool. It looks like a geometric shape drawn with a dotted line. Most often it is a square. You can find it in the second place from the top of the toolbar. Hold down the left mouse button and drag over the object that you want to change. A dotted box appears with this action. This is the selection area.
Step 2
Now the selected fragment of the picture can be transformed. Click on the selection area with the right mouse button. In the drop-down menu, find the item Free Transform and click on it. Markers appeared at the corners and sides of the selection. And also a circle appeared in the middle. With these handles, you can change the shape, size and position of the object. In order to use the marker, move the mouse to it and hold down the left key. Corner handles act on adjacent sides of the square. The center of the selection, marked with a small circle, represents the object's axis of rotation. If you move it to the side, then the axis of rotation will shift. To rotate the object, position the mouse cursor at the level of one of the selection corners. Move the cursor away from the selection until you see an arc icon with arrows at the ends. Now you can hold down the left key and rotate the object.
Step 3
More complex transformations can be done by right-clicking on a selection with markers. A drop-down window appears. It has a number of points. The Scale item allows you to change the size of the object. The Rotate item makes it possible to rotate the area. If you want to skew the object to one side, select the Skew line. When the Distort item is activated, you can affect each marker separately. The Perspective item distorts the object in perspective. And the last transformation option is Warp. When this tool is activated, a grid with additional markers appears above the object. By moving the markers, you can achieve very interesting effects.
Step 4
Rotation transforms are separated from previous effects by a solid line. They all have the name Rotate and the degree to which they can rotate the image. The two bottom Free Transformation menu items allow you to flip the selected object in a vertical or horizontal plane. They are united by the word Flip in the title.
Step 5
For the final application of the transformation, you need to click on the selection icon on the toolbar. In the window that appears, select the Apply item and click on the working area of the program outside the selection area. Transformation is applied.


