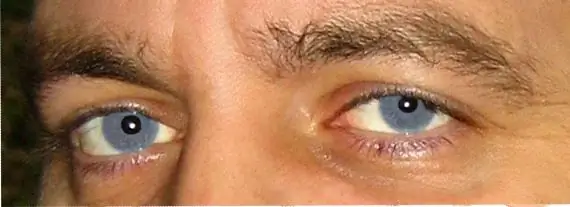
There are not too many people in the world who are completely satisfied with their appearance. Someone is not satisfied with the color of the eyes, someone is not satisfied with the figure … Photoshop provides almost limitless possibilities for modeling your own or someone else's appearance. You can draw how a model will look with a different hair or eye color, with a narrower waist or wide shoulders, and then buy colored lenses or exhaust yourself with sports training.

Necessary
graphic editor Adobe Photoshop, -photography
Instructions
Step 1
To change the color of the eyes (make the eyes blue), open the photo in Photoshop. Select the Rectangular Marquee Tool from the toolbar. Select the area around the eyes and copy it onto a separate layer with Ctrl + J.
Step 2
Now we need to select the iris to change its color. This can be done in a variety of ways. The Quick Mask Mode is very convenient. Press the Q key or on the toolbar choose Edit in Quick Mask Mode. Press D to set default colors.
Step 3
Increase the size of the image for easier work. Choose a hard, small diameter brush and paint over the iris. If you accidentally paint over the wrong area, set the foreground color to white and use the same brush to remove the selection. Now press Q again - you are back in standard mode. From the main menu, choose Select, then Inverse. The iris is now selected and you can change its color.
Step 4
Copy it to a new layer with Ctrl + J. In the main menu, select items Image, Adjustments, Hue / Saturation or press Ctrl + U. Move the sliders to get the color you want.
Step 5
After that, you can open the Color / Balance settings window (Ctrl + B) and still work on the color of the model's eyes.
Step 6
Now you need to get rid of the red pupils. Go back to the layer with the eyes, select the pupils and copy to a new layer as you did in the 3rd paragraph. Do not paint over white dots. In the main menu, select Image, then Adjusments and Black & Wiht. Confirm by clicking OK, then call the Hue / Saturation settings (Ctrl + U) and moving the Lightness slider to the left, change the color of the pupils to black.
Step 7
To keep your eyes beautiful and clear, you need to get rid of the unhealthy redness of the proteins. Go back to the eyes layer, use the Quick Mask to select the proteins and copy them to a new layer. Press Ctrl + L to bring up the level settings window. Move the white slider to the left, but don't overdo it - the photo will look unnatural if the whites of the eyes shine with snowy whiteness.
From the main menu choose Layer and Merge Visible and merge the layers.


