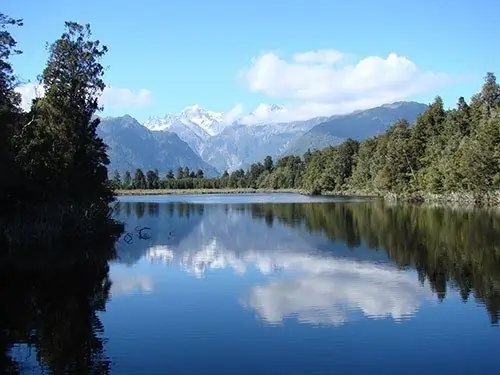
The graphics editor Adobe Photoshop allows you to add realistic effects to images obtained as a result of photographing real objects. Sometimes the basis for such effects is obtained by processing natural photographs. And sometimes natural effects can be obtained through pure synthesis. For example, you can make a reflection in water based on almost any photograph.

Necessary
Adobe Photoshop
Instructions
Step 1
Load an image into Adobe Photoshop where you want to add a reflection in the water. Find out its size. Select Image and Image Size … from the menu, or press Ctrl + Alt + I. Remember the width and height values given in the Width and Height fields, respectively.
Step 2
Convert the background layer to the main one. From the menu choose Layer, New, "Layer From Background …". Select None from the Color list of the New Layer dialog. Click OK.
Step 3
Move on to creating a water texture image. Press Ctrl + N or select the File and New… items from the main menu. In the New dialog in the Width and Height fields, enter values that are several times larger than those obtained in the first step. Click OK.
Step 4
Fill the entire surface of the new document with black and white noise. Set the foreground color to gray (# 808080). Using the Paint Bucket Tool, fill the entire image with it. From the menu select Filter, Noise, "Add Noise…". In the Add Noise dialog, activate the Uniform and Monochromatic options. Set the Amount to 75%.
Step 5
Process the image with the Bas Relief filter. Select an item with the same name in the Sketch section of the Filter menu. Set the Detail parameter to 10-13 and Smoothness to 3. In the Light list, select Bottom. Click OK.
Step 6
Apply motion blur to the image. Select the menu items Filter, Blur, "Motion Blur…". Set the Angle parameter to a value corresponding to the desired angle of inclination of water waves relative to the horizon. Select the Distance parameter. For medium sized images, values of 50-100 are fine. Click OK.
Step 7
Apply a perspective warp to the image. Select Edit, Transform, Perspective from the menu. Press and hold Shift. Slide the top corners of the frame and spread the bottom corners. Carry out the transformation. Click on any button on the toolbar. Click Apply in the message box.
Step 8
Crop the waves. Use the Crop Tool. The dimensions of the resulting area should not be less than the dimensions of the processed image obtained in the first step.
Step 9
Make your image usable with smart filters. Select Filter and Convert for Smart Filters from the menu. Click OK on the request window.
Step 10
Save the resulting image as a Photoshop document. Press Ctrl + S or choose Save from the File menu. In the Format list of the Save dialog, select Photoshop (*. PSD; *. PDD). Enter a name for the file. Click the Save button.
Step 11
Go back to processing the original image. Double the size of the canvas vertically. Press Ctrl + Alt + C or choose Image and "Canvas Size …" from the menu. Double the Height value. Click on the top left button of the Anchor group. Click OK.
Step 12
Create a vertically flipped version of the current image. From the menu choose Layer, "Duplicate Layer …". Click OK in the dialog that appears. From the menu choose Edit, Transform, Flip Vertical. Activate the Move Tool. Move the "reflection" down so that its top edge is aligned with the bottom edge of the original image. If necessary, add a linear perspective deformation to the reflection. Choose Edit, Transform, Scale from the menu. Pull the bottom edge of the frame up until you reach the desired size of the picture. Double click inside the frame to apply the changes.
Step 13
Add waves to the reflection. From the menu select Filter, Distort, "Glass…". In the filter settings dialog, click on the button next to the Texture list. In the menu that appears, select the "Load Texture …" item. Specify the file you saved in the tenth step. Set the Distortion, Smoothness, Scaling parameters to 10, 3 and 100% respectively. Click OK.
Step 14
Blur the reflection image. From the menu choose Filter, Blur, "Gaussian Blur…". In the displayed dialog, select the value of the Radius parameter. Activate the Preview option and focus on the image in the preview pane. Click OK.
Step 15
Connect the layers. From the menu, select Layer, Merge Down. Crop the resulting image, if necessary. Save it to a file by pressing Ctrl + Shift + S.


