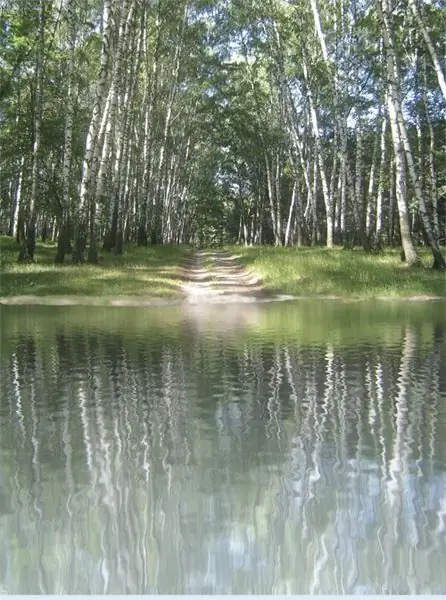
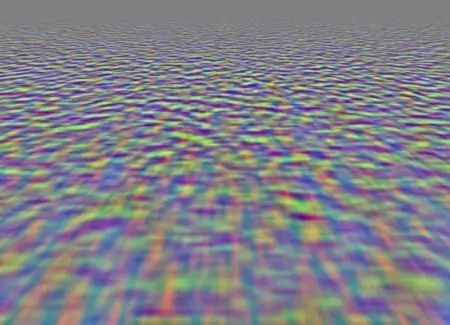
You can create a collage depicting reflection in water using Photoshop filters. In addition, you will need a structure to simulate a water surface, which you can copy from the tutorial or try to create it yourself.

Necessary
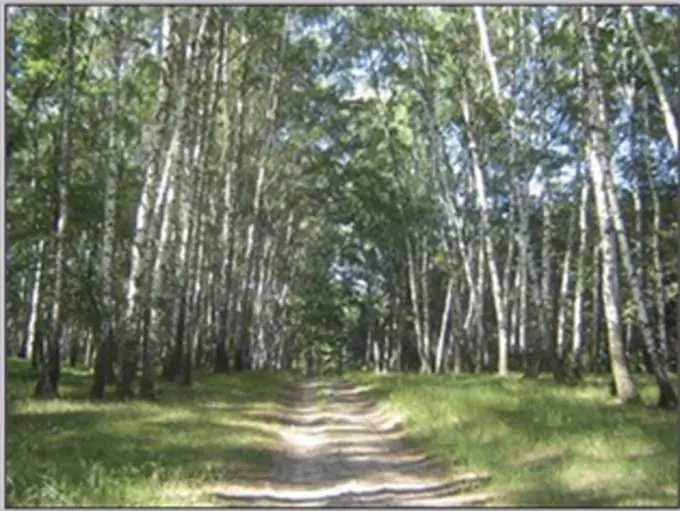
Adobe Photoshop water texture, original image
Instructions
Step 1
Duplicate the texture that you need to create the water surface.
Open it in Photoshop and save it in.psd format under the name "Ripple.psd".

Step 2
Open up your original image and name it Reflection.

Step 3
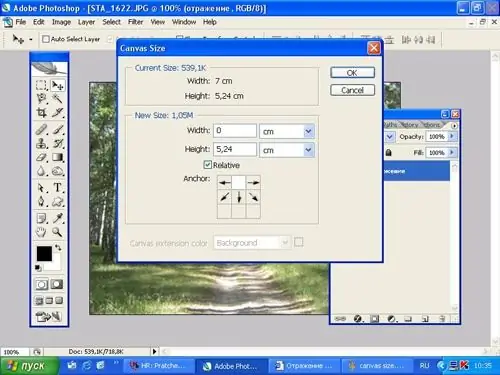
Select Image from the main menu and Canvas Size from the pop-up menu. In order to lengthen the base, in the New Size section, set the same height value as in the original image. Check the Relative checkbox.

Step 4
Duplicate the "Reflection" layer and name it "Shore". Stand on the layer "Reflection", press the key combination "Ctrl" + T, in the selected field, press the right mouse button, then select the items Transform and Flip Vertical. In the main menu, in the View section, there should be a check mark next to Snap. Use the Move tool to move the "Reflection" layer down and dock it with the "Coast" layer.
Step 5
With the "Reflection" layer active, click on the layer mask icon in the layers panel. On the toolbar, select Gradient, set its properties to "black and white linear". With the mask active, hold down the Shift key and draw a line from bottom to top. Part of the layer will become invisible.
Create a new layer and move it to the very bottom. Find the lightest part of the sky in the image and use the Eyedropper Tool (I) to make it the foreground color. Fill the bottom layer.
Step 6
Back on the "Reflection" layer, in the Layers palette in the Lock group, lock the transparent pixels by clicking on the checkerboard-like icon. From the main menu, select Filter, then Bluer and Motion Bluer. Angle value = 90 deg., Distance is arbitrary, depending on what kind of wind is assumed in the image. Unlock transparent pixels.
Step 7
Press the Ctrl key and click on the reflection icon to get a selection of the layer. Select Filter from the main menu, then Distort and Displace. Set the values in accordance with your intention, taking into account that the Horizontal parameter should be approximately 2 times less than the Vertical parameter. Confirm your selection with OK. In the dialog box that appears, select the structure that you saved under the name "Ripple" and confirm the selection
Step 8
Deselect the selection by pressing Ctrl + D. From the main menu create a Layer adjustment layer, then New adjustment Layer and Levels. Confirm with OK. Using the right mouse button, call the drop-down menu, select the Create clipping mask item in it - this way you have created a clipping mask. Double click on the adjustment layer go to its properties and set approximately the following values: 0; 0, 8; 240.
You can customize the shoreline to soften the transition. Use your skills and imagination to create a realistic landscape.


