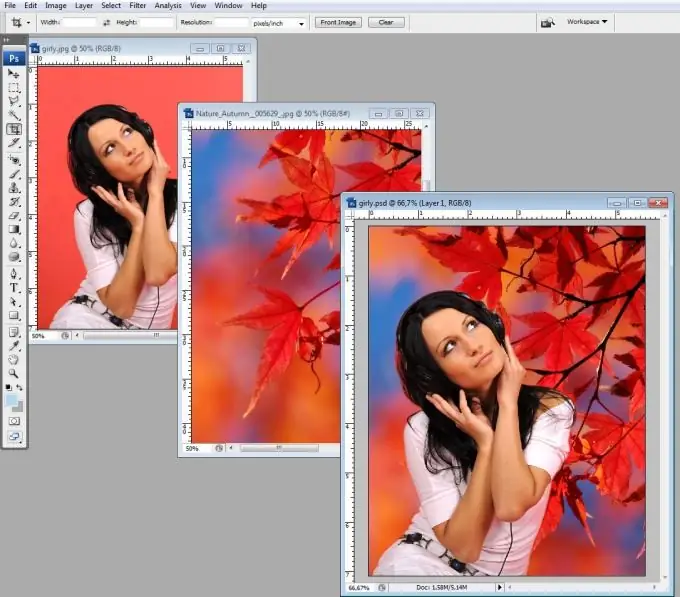
If you are not satisfied with the background of the image you have, the graphic editor Adobe Photoshop and its capabilities can always come to the rescue. Using it, you can create a file consisting of two separate layers, one of which will be the image or photo you need, and the second - a suitable background for it.

Necessary
- graphic editor Adobe Photoshop
- two digital images
Instructions
Step 1
Open in a graphics editor the photo for which you want to change the background.
Step 2
Select “Magic Wand” from the toolbar. Give her space around the object (in our case, around the girl). It may take a few clicks to do this. When doing this, make sure that the instrument settings are the same as in the illustration.
Step 3
If the stick has selected not only the background around the object, but also some areas of the object itself, this is easy to fix. Select the lasso tool and the selection mode "subtract from selection" as shown in the picture above. Now draw a lasso around the areas that should not be selected.
Step 4
Invert the selection by pressing Ctrl + I. Now you need to make the selection softer using the menu item Select - Modify - Feather (Selection - Modification - Feather). Specify a feathering radius of 1-2 pixels in the dialog box and click OK.
Step 5
Now we can move our girl to a separate layer from the background using the Ctrl + J keyboard shortcut. Pay attention to the layers palette: now there are two layers. On the top of them is a girl separate from the background.
If you don't have a layers palette in your workspace, bring it up by pressing F7. You can now delete the bottom layer by clicking on the trash can in the lower right corner of the layers palette. Our model will remain on a transparent background, under which you can choose any substrate.
Step 6
Open the new background file that you would like to copy. For example, these maple leaves. There should be only one layer in the layers palette called "Background" or "Background". Now you can either copy the girl's image to the background file, or vice versa. In any case, you need to drag the layer you want from the palette into the second document. Keep the left mouse button pressed while dragging.
Step 7
Edit the file so that it looks like you want it. Correctly arrange the layers in the palette in the required order relative to each other. The order of the layers is also changed by dragging with the mouse while holding down the left key.
Step 8
Scale the layers relative to each other. To do this, select the layer in the palette, the size of which you want to change relative to another layer, and press the key combination Crtl + T. After that, you can resize the layer in two ways: either by entering numerical values into the zoom bar, or by resizing the layer with the mouse. If you are working with the mouse, hold down the Shift key, then the layer will be resized proportionally. Having picked up the scale that you need, press the "Enter" key.
Step 9
Using the tool "Move" ("Move") set the background layer and the layer with the portrait of the girl relative to each other so that you like the result. If necessary, crop the image with the "Crop" tool.
Step 10
Save the finished file in the format you need (for example, jpeg) using the menu options "Save" or "Save as". So the photo is ready with a new background!


