All modern laptops come with a built-in microphone, which frees you from the hassle of buying it separately. But it happens that the built-in microphone does not function, and if the problem is not a malfunction of the microphone itself, it is worth visiting the system settings.

Instructions
Step 1
Let's consider the most versatile and simple way to turn on the microphone, regardless of the drivers installed and the type of sound card of your computer.
The first paragraph of the step is instructions for Windows 7, the second for Windows XP.
Images are for Windows 7.
Win7:
Find the speaker icon in the tray and right-click on it.
WinXP:
Go to Start -> All Programs -> Accessories -> Entertainment -> Volume

Step 2
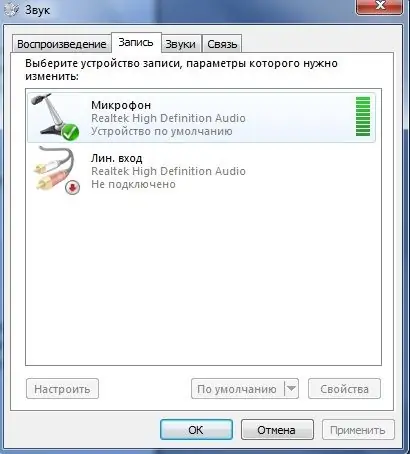
In the menu that opens, select the "Recorders" item.
Open "Parameters", select "Properties" in them.

Step 3
Find and select the desired microphone by clicking the left mouse button.
Find "Microphone" and put a tick in front of it. "OK".

Step 4
Right-click on the microphone, select "Enable".
If the pictogram has become colored and a check mark appears on it, everything is done correctly.
We go to the "Volume" menu (see the first step). We are looking for a slider under the inscription "Microphone", move it to the desired position (adjust the sensitivity of the microphone).


