Modern computer technology has made it possible to connect your PCs to a local area network. This allows you to exchange files, use the shared Internet and print documents on one printer.

It is necessary
- - fiber optic cable;
- - LAN card;
Instructions
Step 1
Determine how far the two computers are from each other. Purchase the required footage of fiber optic cable from a specialist retailer. With the help of a specialist, crimp the ends of this cable to avoid further loss of communication quality. Buy network cards.
Step 2
Unscrew the side panels of the processor cases. Insert network cards into the bottom slots. Assemble the case back.
Step 3
Download the "fresh" versions of the drivers from the network card manufacturer's website. Install them on your personal computer. Restart your Windows operating system for all changes and updates to take effect.
Step 4
Insert the cable into the "socket" of the network card. If the green light is on, then the physical connection is established.
Step 5
Start your Windows XP computer. Left-click on the "My Computer" shortcut. In the left part of the dialog box, click the link "Control Panel". Click on the "Network Connections" shortcut. You will see a shortcut "Local Area Connection". Right click on it and go to "Properties". Open the “TCP / IP” tab. In this window go to "Properties". Enter the IP address 192.168.0.1 as this will be the "host" computer. Enter the subnet mask 255.255.255.0. Click "Save" and leave this menu.
Step 6
Start your Windows Vista computer. Click the "Start" - "My Computer" button. Right-click on the "My Computer" shortcut and select "Properties". Find "Computer Name, Domain Name, and Workgroup Settings." Left-click on "change parameters". Change the workgroup name to “MSHOME”.
Step 7
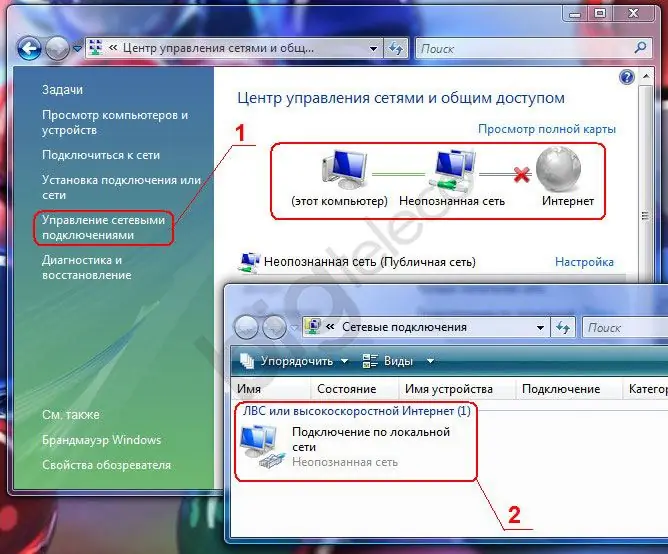
Go to "Control Panel" - "Network and Sharing Center". Open the properties of this shortcut. Enter the IP address 192.168.0.2, the subnet mask 255.255.255.0, and enter 192.168.0.1 for the default gateway. Save and exit.
Step 8
Go to the command line and enter: ping 192.168.0.1-t. If a line with the text "Reply from …" is sent, then the local network is working normally.


