Often times, PC users have problems setting up Bios to boot from disk. This function is sometimes needed not only to start installing Windows, but also to diagnose the operating system with various utilities.

Instructions
Step 1
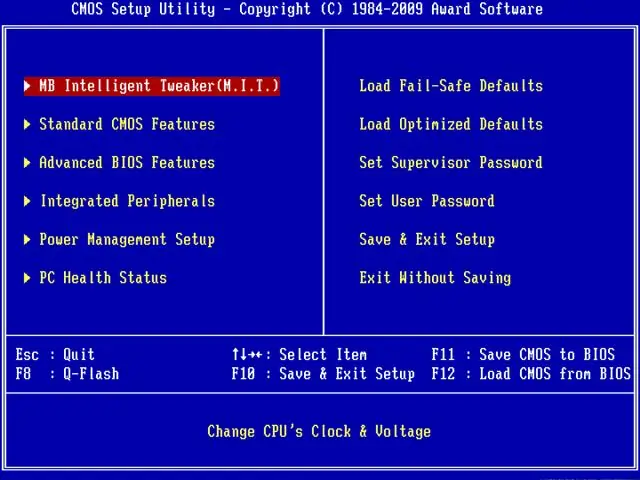
First you need to enter the BIOS - to do this, restart your computer and as soon as the device check starts and the letters appear on the black screen, press the Delete key. For newer motherboards and laptops, you can also use the F2 key. Navigation in the Bios menu is done by arrows. To cancel an action, use Esc, to reboot - Ctrl + Alt + Delete, to save changes - Enter.
Step 2
Select Advanced Bios Features and press Enter. In the menu that opens, find the First Boot Device, Second Boot Device items (depending on the motherboard and Bios version, the names may differ slightly). These options are responsible for the order of the devices from which the operating system will boot. By default, Floppy will be selected in the first item, Hard Disk in the second, and Cd-Rom in the third. Highlight the First Boot Device item, press the Enter key, select the Cd-Rom boot option with the arrow and press Enter again. Next, select the Second Boot Device item and set it to Hard Disk. After that, go to the main Bios menu, select Save and Exit Setup and confirm the saving of changes. Your operating system will now boot from disk.
Step 3
After completing the necessary steps for installing Windows or diagnosing the system, return the previous boot order, otherwise the boot procedure from the disk will be performed over and over again. To do this, enter Bios again, open the Advanced Bios Features menu. Then select the First Boot Device item, set it to Hard Disk. Set Second Boot Device to Cd-Rom.


