In many computers and laptops today you can find an additional chip called TPM. In the operating system, it is defined in the Security Devices section. What kind of beast is this and what is it, in fact, needed for - let's talk today.
A trusted platform module, or TPM (trusted platform module), is a separate microchip on a computer's motherboard that performs a specific set of tasks related to cryptography and computer security.
For example, using a TPM cryptoprocessor, you can encrypt your computer's hard drive. Of course, the central processor can also do this, but then it will have to perform more tasks, and the speed of encryption and decryption will be much lower. Hardware-based encryption in the TPM occurs with little or no performance loss.
Also TPM can protect credentials and check programs running on the system. Prevents infection with rootkits and bootkits (types of malicious programs that penetrate the computer before the operating system boots or hide their presence in the system, and therefore cannot be recognized by the system), making sure that the computer's configuration is not changed without the user's knowledge.
In addition, each TPM cryptographic module has a unique identifier that is written directly to the chip and cannot be changed. Therefore, the cryptochip can be used for authentication when accessing the network or any application.
TPM can generate strong encryption keys when required by the operating system (OS).
But before using the TPM, you need to configure it. Setting up a module comes down to a few simple steps.
First, the chip must be enabled in the computer's BIOS. To do this, go to BIOS and go to the section related to security. Although the BIOS can vary significantly from computer to computer, generally the section with the security settings is called "Security". This section should have an option called "Security Chip".
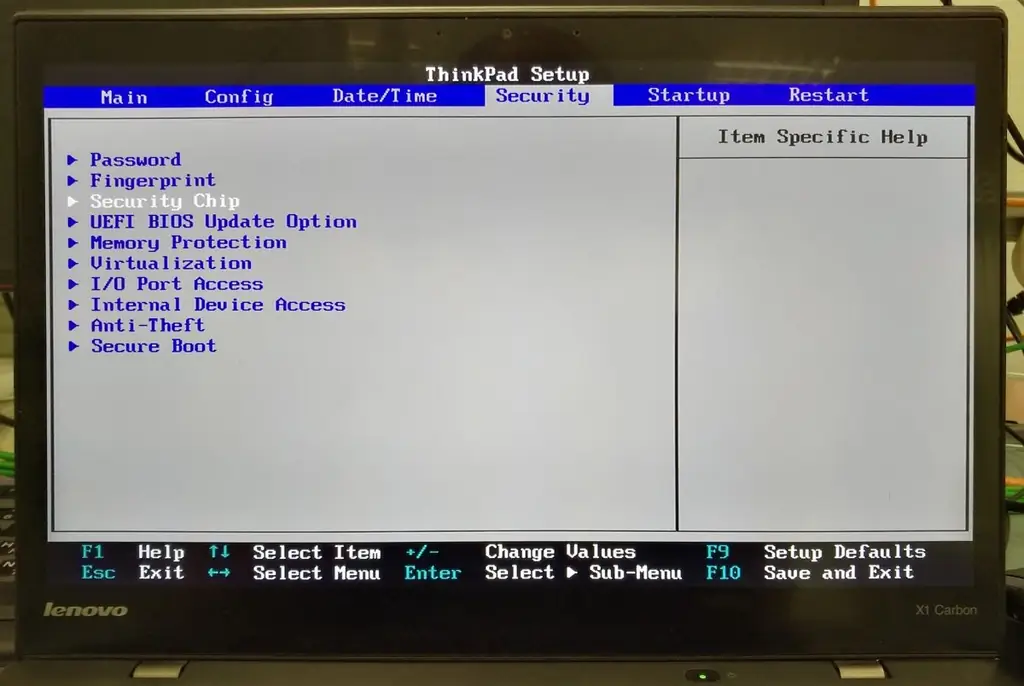
The module can be in three states:
- Disabled.
- Enabled and not used (Inactive).
- Enabled and enabled (Active).
In the first case, it will not be visible in the operating system, in the second, it will be visible, but the system will not use it, and in the third, the chip is visible and will be used by the system. Set the state to "active".
Right there in the settings, you can clear the old keys generated by the chip. This can come in handy if, for example, you want to sell your computer. Please note that by erasing the keys, you will not be able to recover the data encrypted with these keys (unless, of course, you encrypt your hard drive).
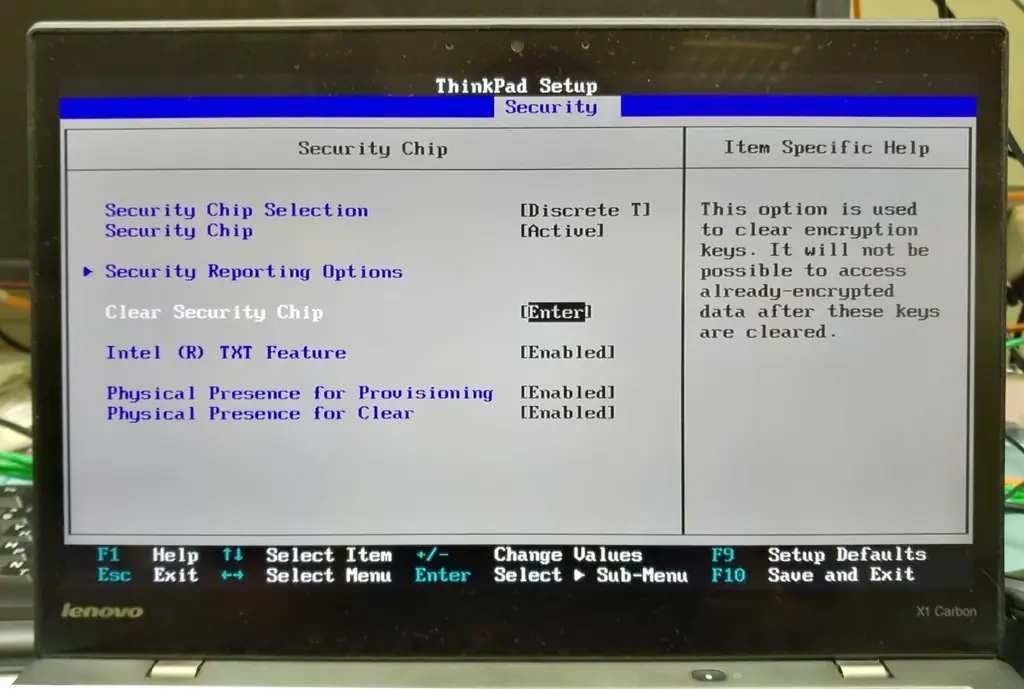
Now save your changes and restart your computer ("Save and Exit" or F10 key).
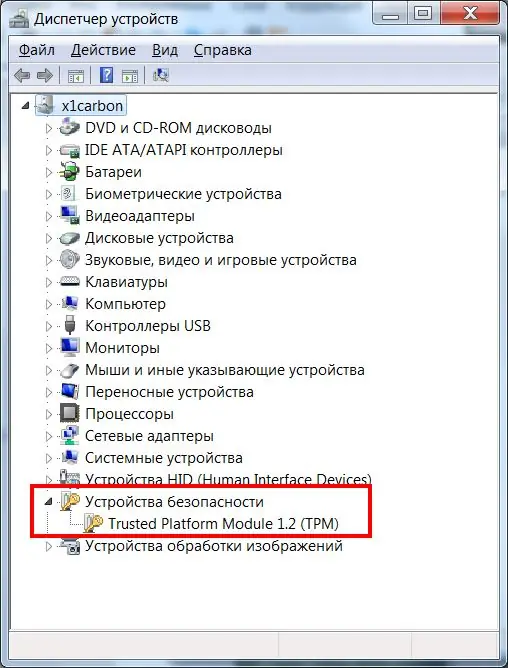
After the computer boots up, open Device Manager and make sure that the Trusted Module appears in the list of devices.
It remains to initialize the chip in the operating system. To do this, open the TPM Management snap-in. Press Windows Key + R (the Run window will open) and enter tpm.msc in the input field. This launches the Trusted Platform Module (TPM) Management on Local Computer snap-in. Here, by the way, you can read additional information - what is TPM, when you need to turn it on and off, change the password, etc.
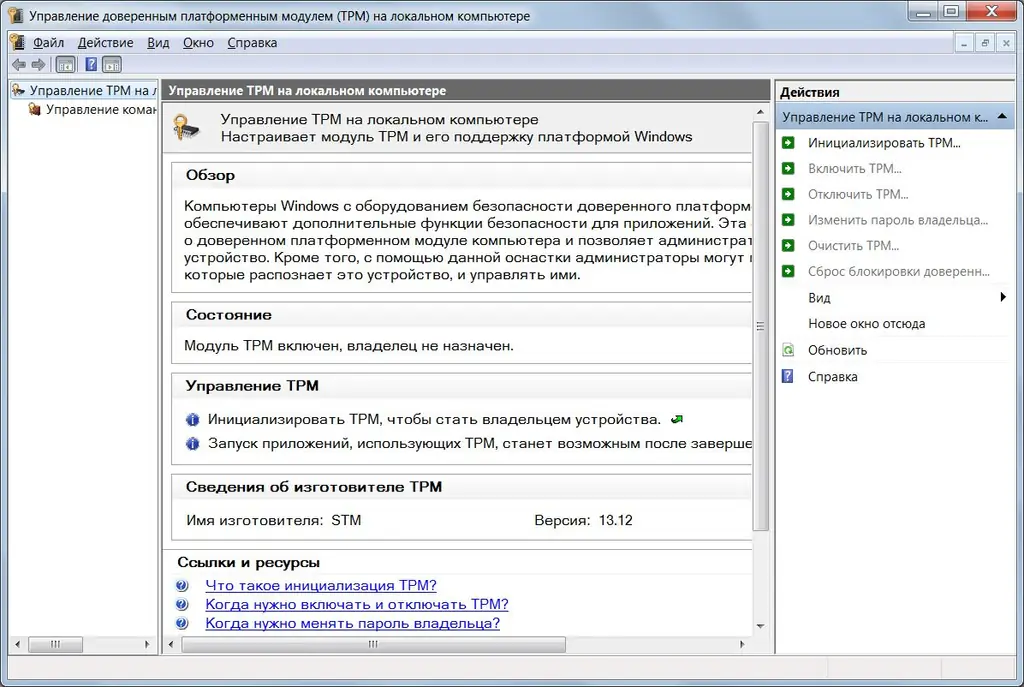
On the right side of the snap is the action menu. Click "…". If this feature is not active, then your chip has already been initialized.
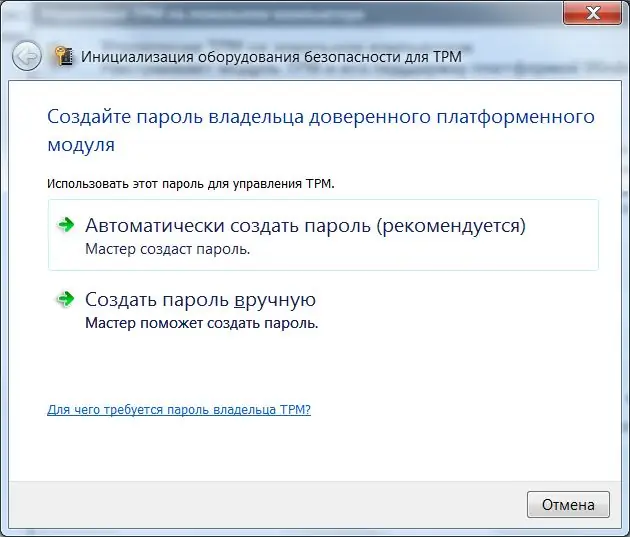
When the TPM Initialization Wizard starts, it prompts you to create a password. Select the "Automatic" option. The TPM initialization program will generate a password. Save it to a file or print it.
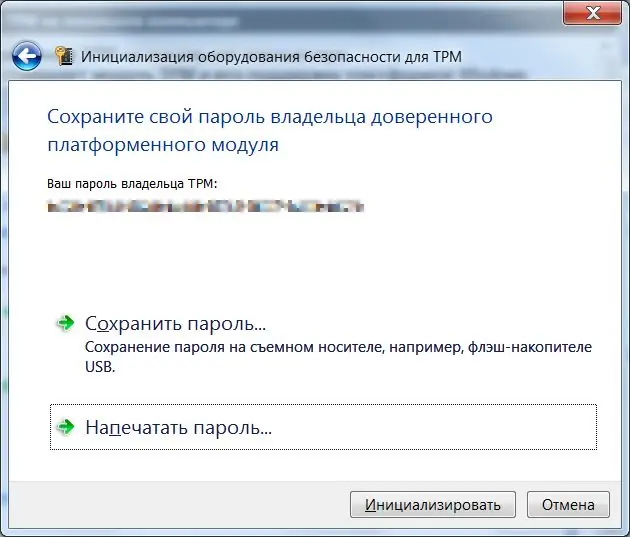
Now click the "Initialize" button and wait a bit. Upon completion, the program will inform you about the successful initialization of the module. After the initialization is complete, all further actions with the module - shutdown, cleaning, data recovery in case of failures - will be possible only with the password you just received.
Actually, this is where the TPM management capabilities end. All further operations that will require the capabilities of the chip will occur automatically - transparent to the operating system and invisible to you. All of this must be implemented in software. More recent operating systems, such as Windows 8 and Windows 10, use TPM capabilities more widely than older operating systems.


