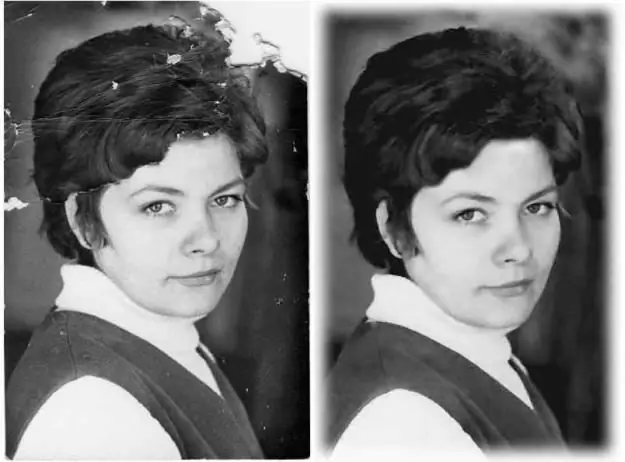
In every family there are memorable film photographs, which sometimes exist in a single copy and are passed down from generation to generation. Unlike digital photographs, such photographs invariably wear out over time, and if the photograph is very old, its quality leaves much to be desired: the image fades, cracks and spots appear on the surface of the photograph, and often photographs are torn.

Instructions
Step 1
You can restore a photo using Adobe Photoshop, and then save it digitally for years to come. Scan your photo at a good resolution and then open the scanned image in Photoshop.
Step 2
Change the photo from RGB color to Grayscale to see the most damaged areas of the image.
Step 3
Zoom in on the photo by clicking on the magnifying glass icon in the toolbar or by using the Ctrl + keyboard shortcut. Fix visible minor blemishes in your photo with the Healing Brush, Spot Healing Brush, and Clone Stamp tools.
Step 4
In the latter case, click on the undamaged area of the photo, which you want to use to close the damaged area, while holding down the Alt key. Then set the desired brush size and work on the damaged area with a brush on which one of the areas of the photo was copied.
Step 5
Click on very small defects with a spot repair brush. Using the Clone Stamp, try to copy the areas with the same texture as the damaged areas so that the retouch is invisible.
Step 6
In the Image menu, open the Levels section and add photos with more contrast. Now select the Burn and Dodge options on the toolbar and apply each of the tools to those parts of the photo and the faces of the depicted people that you want to darken or lighten.
Step 7
Crop the jagged edges of your photo and sharpen it using the Smart Sharpen filter. Switch the photo back to color mode and use the Color Balance option to give the photo a certain color tone. Create a frame on the photo, if necessary.


