First, let's define the difference between the definitions "Multiboot flash drive" and "installation flash drive". The latter definition is often understood as a flash card from which a specific operating system will be installed (most often it is Windows XP or 7). A useful thing, but by no means universal. A multiboot flash drive allows you to operate with a large number of functions, such as: loading drivers, launching certain programs in MS-Dos mode, and much more.

Necessary
- Devices:
- USB flash drive with at least 4 Gb. (better 8)
- Work PC or laptop.
- Programs:
- Hiren's BootCD Image (8.0-10.0)
- USB Disk Storage Format
- Grub4dos archive
- Daemon tools
Instructions
Step 1
At the initial stage of work, you need to format the flash card. Naturally, this should be done not with standard Windows tools, but with a special utility. Otherwise, we will not succeed.
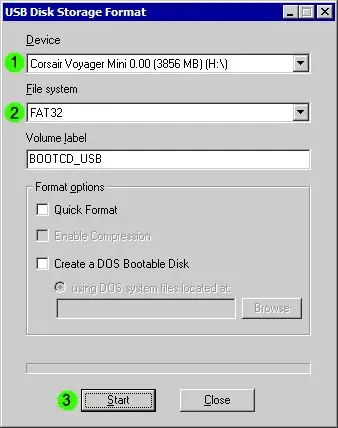
After installing the flash drive, run the previously found USB Disk Storage Format. In the first window, select the required flash drive, in the second - the FAT32 file system, in the third - the name of the flash drive (preferably in Latin letters). Click "Start". Your flash drive is formatted and ready to create a multiboot flash drive.

Step 2
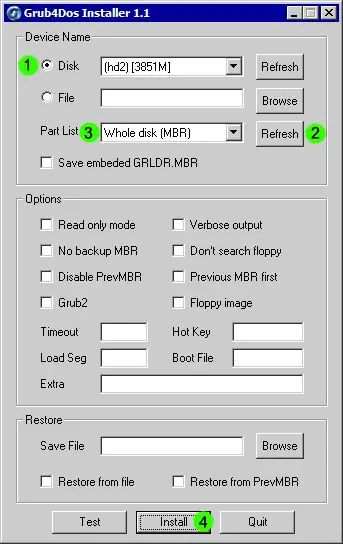
Run the "grubinst gui" utility from grub4dos. In the window that appears, in the first field, find the required flash card. In the Part List field, after clicking the Refresh button, select Whole Disk (MBR). Click Install.
Now go to the folder containing grubinst_gui.exe, find the grldr files without the extension and menu.lst in it, and copy them to the root directory on the USB flash drive.

Step 3
Using the daemon tools program (as a variant of Alcohol soft), copy all the files contained in Hiren's BootCD to a USB flash drive.
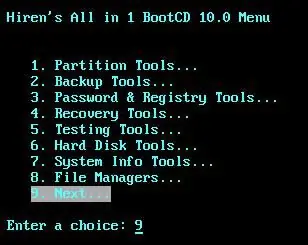
Reboot your "machine" and set the boot priority to the flash card in BIOSe. (Note: if this is not possible, then either your motherboard does not support this feature, or a BIOS update is required). As a result, every next time you start your computer with a multiboot flash drive inserted, you will see the picture from image 3.


