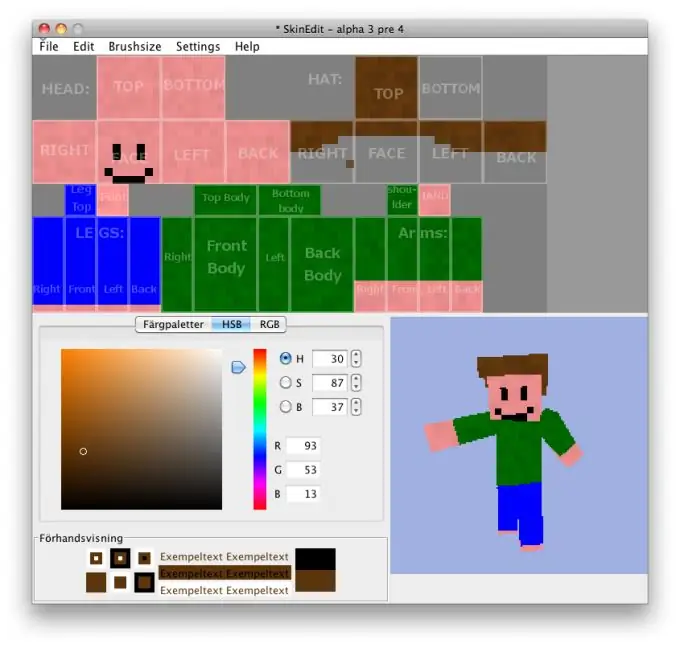
With the help of a skin in the Minecraft game, you can change the appearance of a character. To stand out from all the players, you can dress him in a unique costume, created by yourself. And for this you need to understand how to make a skin in Minecraft.

Instructions
Step 1
To create your own skin in Minecraft, you need to install a special utility MC Skin Editor on your computer. Download it, unzip it, run the installation file, wait for the installation to finish.
Step 2
To create your own skin for a Minecraft game character in the installed program, you will need artistic abilities and imagination, as well as the ability to work with computer equipment. It is much easier to download a ready-made version of clothing and change it at your own discretion.
Step 3
Make the necessary changes to the skin. Textures for it can be found in pictures from the network, as well as use the built-in capabilities of the MC Skin Editor program. Save the file after editing to your computer's hard drive.
Step 4
Now that you understand how to make your skin in Minecraft, you will probably have a question about how to install it. You can easily change the skin in the licensed version of the game on the official website of the game by uploading your picture in.
Step 5
However, users of pirated versions do not have to despair. A new skin in Minecraft can be installed in it, but it will be a little more difficult to do this.
Step 6
Install the Java Development Kit program and the Minecraft decompilation application on your computer, as well as uninstall the old Minecraft client by downloading a clean version.
Step 7
Create a new folder on your hard drive and name it Minecraftskins. Save the decompiler in it, create a folder named "jars" there.
Step 8
Open the game folder on your computer, find the name "bin" in the directory, save a copy of it in "jars".
Step 9
Run the decompile.bat file. It will decompile it. After that, in the created folder "Minecraftskins" find the java files using the path "src-> minecraft-> net-> minecraft-> src". They must be named EntityOtherPlayerMP, EntityPlayer, and EntityPlayerSP. Open them in notepad and change the specified Internet address in them to your own. Save your changes.
Step 10
Run recompile.bat and then reobfuscate.bat in sequence. Open Minecraft / bin / minecraft.jar with the archiver and copy the three created files from the Minecraftskins-> reobf-> minecraft folder into it.
Step 11
Delete the META-INF folder. If you succeed in making a skin, the Minecraft client will find it at the address you specified.


