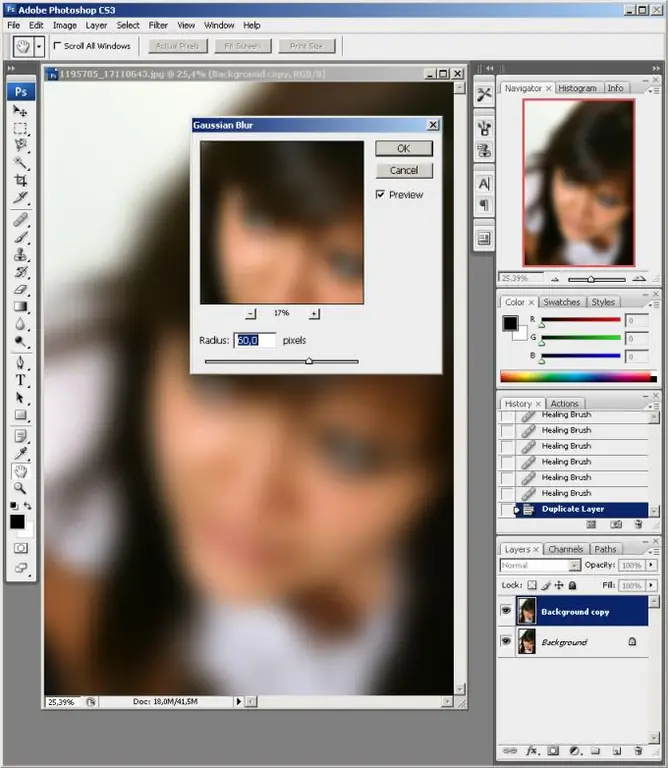
One of the most common digital photo processing operations in Adobe Photoshop is portrait retouching. It is aimed at eliminating natural or technically introduced defects in the skin of the person shown in the photo. There are many articles and tutorials written about how to make skin beautiful in Photoshop. They present both simple and fairly complex methods. Simple methods are often as good as complex ones in terms of the quality of the final image.

Necessary
Universal editor for digital raster images Adobe Photoshop
Instructions
Step 1
Open the photo in the editor. To do this, select the "File" and "Open" items in the menu, or press the Ctrl + O keys.
Step 2
Select and adjust the Healing Brush Tool. The tool is available on the main toolbar. After choosing the Healing Brush Tool, set the appropriate brush size in the top panel. The size of the brush should be selected depending on the image resolution so that it is comfortable to work with.
Step 3
Remove large defects with the Healing Brush Tool. Press and hold the Alt key. Then click on the place of the photo, which will serve as a reference for the restored areas of the image. Click or drag a brush over the place of the photo where you want to fix the defect.
Step 4
Duplicate the current layer. Select "Layer" and "Duplicate Layer" from the menu.
Step 5
Apply "Gaussian Blur" filter to the new layer. To do this, select the "Filter", "Blur", "Gaussian Blur …" menu items. In the dialog that appears, in the "Radius" field, set the value to 60. Click the "OK" button.
Step 6
Erase non-skin blurry elements. Select the Eraser Tool from the panel. In the top toolbar, set the appropriate brush diameter. Enter 20 in the "Opacity" field of the same panel. Draw the brush over the places of the image that you want to erase.
Step 7
Align the layers. Select "Screen" display mode for the current layer. This is done in the drop-down list of the "Layers" tab. Right-click on the current layer in the layer list and select "Merge Down" from the drop-down menu.
Step 8
Bring the brightness of the photo to its previous appearance. Select "Image", "Adjustments", "Levels" from the menu, or press the key combination Ctrl + L. Move the middle slider below the diagram until the brightness of the photo is the same as before the layers were combined. Click the "OK" button.
Step 9
Save the modified image. Press Shift + Ctrl + S, or select "File" and "Save As …" from the menu. In the dialog that appears, specify the format, name and path to save the file. Click the "Save" button.


