Now all reports are performed mainly on a computer using various graphic and text programs. The most commonly used text editor is Word from the MS Office package. It allows you to build charts and graphs by your own means, as well as import them from an Excel spreadsheet editor.

Necessary
- - computer;
- - MS Word.
Instructions
Step 1
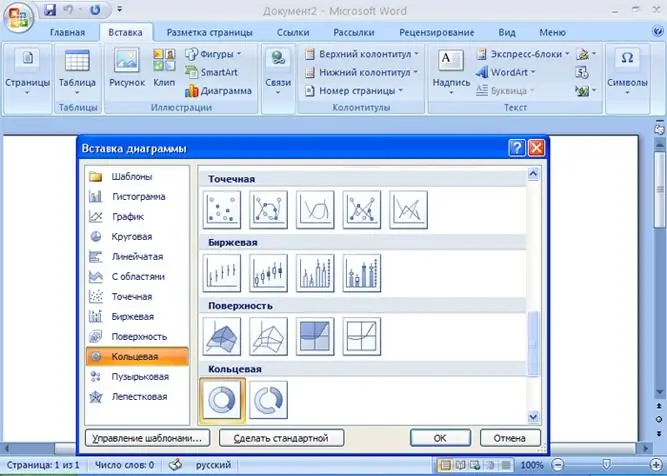
To build a diagram in MS Word 2007, go to the "Insert" tab in the main menu, then select the "Diagram" command. A window appears, on the left side of which is a list of chart templates, and on the right - their view. Select the chart that you think is suitable for your report and confirm your choice by clicking OK. Next, a window of the MS Excel spreadsheet editor opens with a table corresponding to the selected diagram. Thus, there are two windows on the screen: Word and Excel. Double click on a table cell and change its value. The appearance of the chart will change after you press the Enter key.
Step 2
You can create a chart in Word from a table. In the "Insert" tab, click the "Table" button. You will be offered several ways to create it: 1. Determine the size of the table in the template; 2. After selecting the "Insert Table" command in the "Insert Table" window, define its parameters: the number of rows and columns and auto-fit of the column width; 3. Select the "Draw Table" command if you need a table with predefined parameters. The Pencil tool appears. Draw rows and columns of the desired size; 4. The command "Excel Table" at the bottom of the screen will open the window of this table editor. Enter cell values, press OK to complete the entry; 5. Using the Quick Tables command, you will be offered several table templates.
Step 3
Fill in the table with data. In the main menu, select the "Menu" item. In the new menu bar that appears, expand the "Table" list, then click "Select" and "Select Table". In the same ruler, select the items "Insert" and "Object". In the Object Type list, find Microsoft Graph. The program will suggest the most suitable chart type for your table. If you want to change it, double-click on the image and select "Chart" and "Chart Type" from the menu. To return to the Word document, click anywhere outside the picture.
Step 4
To import a table from Excel, select the required cells or the entire sheet and copy the selection to the clipboard by pressing Ctrl + C. Open a Word document, mark the place where the table will be inserted and press Ctrl + V. The Paste Options button appears next to the new data. If you want the table to reflect any changes that will be made to the original document, select either Keep Source Formatting and Link to Excel or Use Target Table Style and Link to Excel.


