The visual presentation of information greatly facilitates perception, especially when it comes to the structure and sequence of something. The use of the schema is the most appropriate here. Schemes are used not only in presentations, but also in texts (reports, scientific papers, etc.). The graphic embodiment of the structure serves as a skeleton for the text and supports the reader. The Word text editor contains everything you need to draw a diagram in a document without using third-party programs.
It is necessary
- A computer
- Microsoft Office Word 2007 (2003)
- Beginner Skills
Instructions
Step 1
An arbitrary scheme can be drawn using shapes, combining them with arrows and other special characters. Techniques for working with shapes.
Click on the Shapes button. A list of possible objects will appear. Select any with one click with the left mouse button. Then move the mouse pointer over the sheet. A cross will appear instead of an arrow. Hold down the left mouse button and drag the shape to the desired size.
Step 2
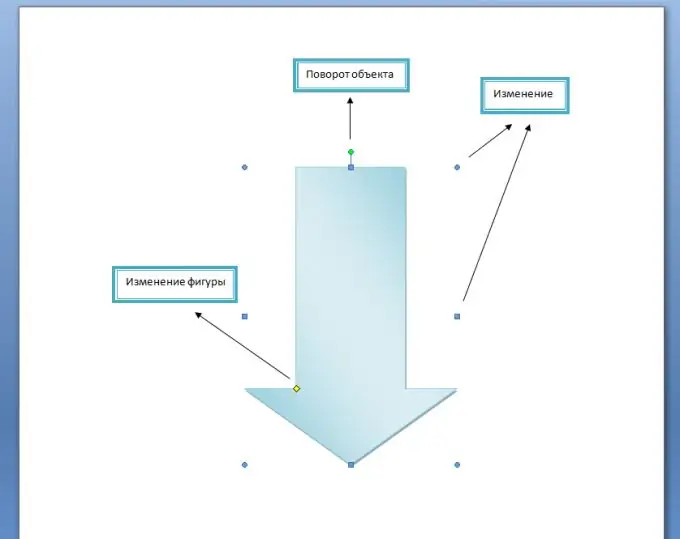
The size of the shape is adjusted using the blue dots of the outline. Move the pointer over such a point, it turns into a double-headed arrow. Hold down the left mouse button and drag the path to the right or left. You can rotate the shape with the green dot at the top of the path. Hover over a point, the rotation will be shown with a round arrow. Move the mouse and bring the object to the desired position.
Some shapes have a yellow dot for changing the outline (arrow span, leader length). Move the mouse pointer over it, "catch" with the left button and drag.
Step 3
To move the shape, move the mouse pointer over it, it will turn into a cross-shaped arrow, hold down the left button and drag the path to the desired location. To copy a shape, press and hold the Ctrl key while left-clicking your object, then release the button.
To copy several shapes, first select them using the Ctrl key: hold it down and click the desired shapes with the mouse. Without removing the selection, drag the group.
Step 4
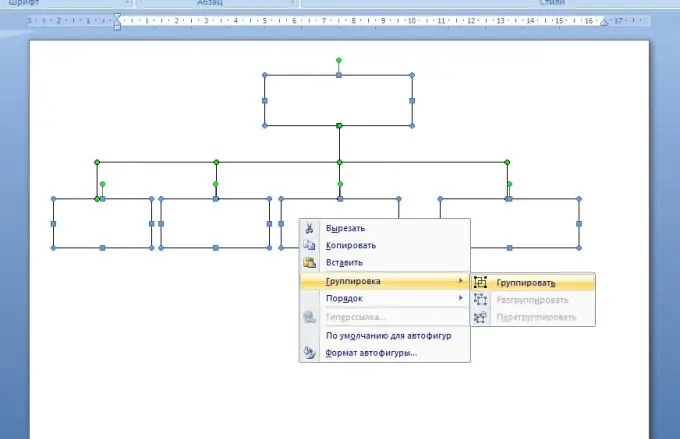
To fix multiple shapes to avoid accidental displacement, they should be grouped. Select the group using the Ctrl key, as in step 3. Then right-click on the selected objects, in the context menu select the "Group" command. If you want to change the position of the shapes, ungroup them: right-click on the group and select the "Ungroup" command from the menu.
Step 5
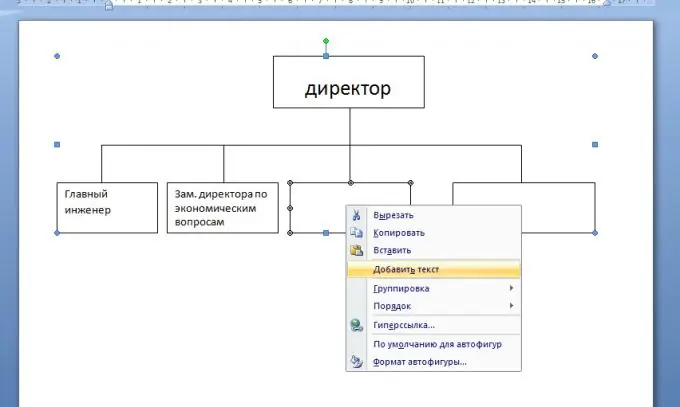
To enter text into a shape, right-click on it and select the "Add Text" command from the context menu.
Step 6
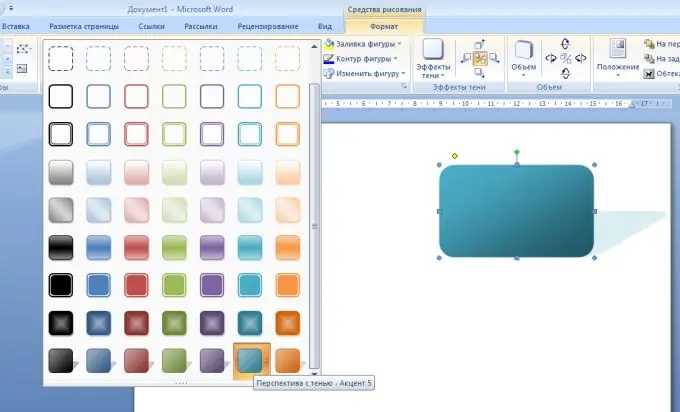
Immediately after inserting a shape in the ribbon, the Drawing Tools - Format tab opens. Apply various parameters to the selected object: color, volume, shadow, outline - everything can be adjusted manually.
Step 7
You can also create a diagram using SmartArt.
Techniques for working with SmartArt objects.
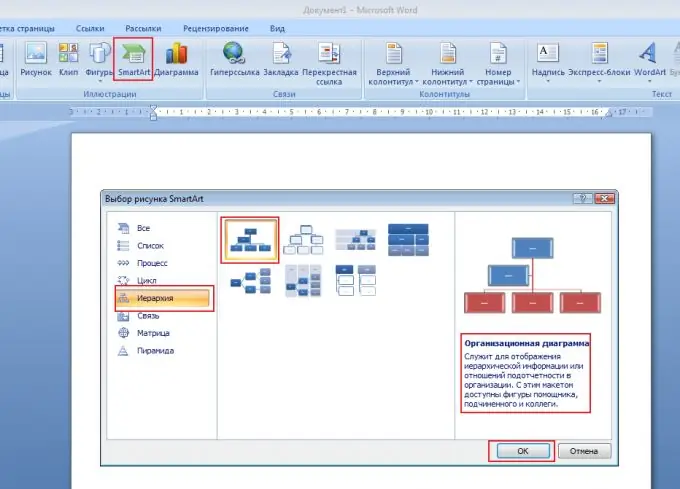
On the Insert tab, select SmartArt. The object selection window will open. The types of circuits are listed on the left side of the window. In the center, their varieties are given, and any click is displayed on the right side. Since each type of object has its own purpose, a little explanation is given below the sketch to make it easier for you to make a choice.
Step 8
The most common and convenient layout for creating a diagram is Hierarchy. Select the object and click OK. A layout with several blocks located in a vertical hierarchy will appear on the sheet: the main one, the assistant and three subordinates (who are "colleagues", that is, are equal to each other).
Step 9
Blocks can be removed or added. To delete a block, click on it, then press Delete or Backspace.
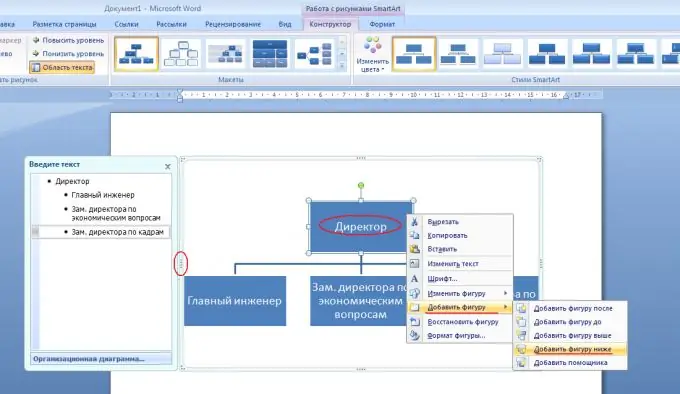
To add a block, right-click in the rectangle relative to which you are going to add. In the context menu, select the Add Shape command, then specify where exactly: above or below, before or after
Step 10
To enter text into a block, simply click on the word "Text" and start typing. Another way is to type in the text area. Find the protrusion on the left on the outline of the circuit, click on it. A bulleted list is displayed with a separate line for each block.
Step 11
The SmartArt menu has a rich selection of style elements. As soon as you insert an object, the SmartArt Tools tab opens. There you can customize the view, position in space, shadow, color, etc.


