The Sims 2 has the ability to add custom content. If you decide to create your own object for the game, you need to take care that it does not conflict with the existing ones. Therefore, you should change the GUID for it.

Necessary
- - SimPE;
- - Microsoft. NET Framework.
Instructions
Step 1
In simple terms, a GUID is a unique set of numbers and letters that helps the game recognize an object and not confuse it with existing ones. To import new content into the game and change the GUID, you need to install the SimPE program. This application also requires the Microsoft. NET Framework to run correctly.
Step 2
Prepare the model for import into the game and start SimPE. In the program window, select the Object Workshop tab and click on the "Start" button. Wait for all the files you want to download. Select from the catalog an item suitable for your purposes, clone it and save it to a new file, assigning it an original name. After the new item is created, go to the Plugin View tab.
Step 3
If you want to change the GUID of an existing object, go directly to the Plugin View tab and open the required file. The GUID field already contains a value that you need to change. To receive a new GUID, you must be registered on the SimPE website at https://sims.ambertation.de. Make sure that your computer is connected to the Internet, open the Object Data (OBJD) section, give a name to your object and click on the Get GUID link string.
Step 4
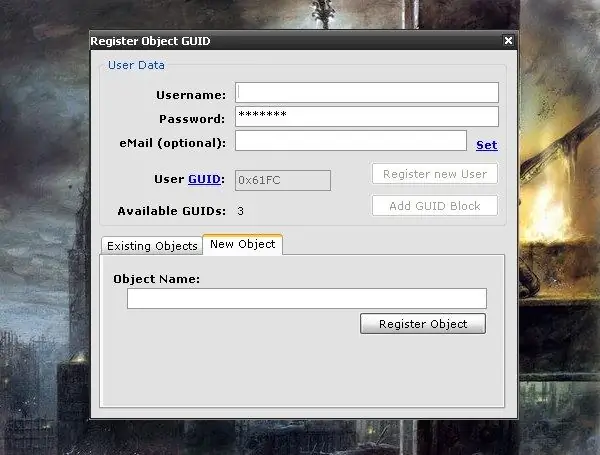
If you already have an account on the SimPE website, enter your login, password, email address in the window that appears and click on the Register Object button. If an account has not been created, register by clicking on the Register new User button, and after that you will receive a GUID for your object.
Step 5
After that, the value in the GUID field will change, put a marker in the update all MMATs field, click the Update button to update the links in the object, and the Commit button so that the new values are added. Next, edit other parameters: assign new textures, import your own mesh, replacing it with the game one, adjust the material properties and save the changes made to the file.


