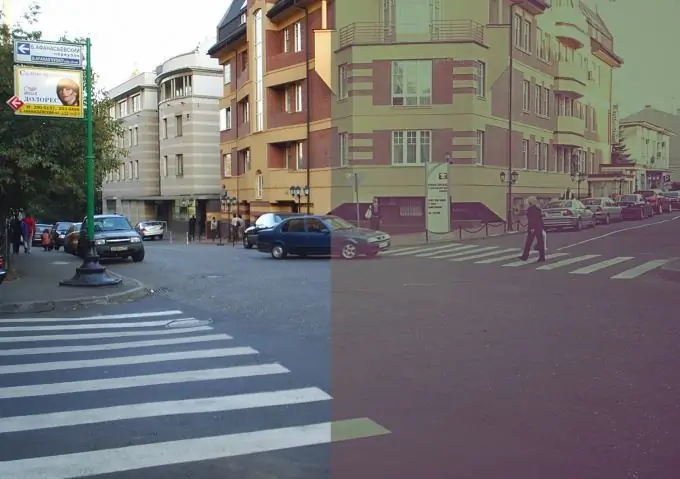
There are many ways to give your photo a vintage look. Basically, it is a combination of color correction with the addition of textures and vignettes. Perhaps, once you get comfortable with working in the graphics editor Photoshop, you can invent your own way to stylize photographs for vintage.

Necessary
- - Photoshop program;
- - Photo.
Instructions
Step 1
Select the photo you will work with and open it in Photoshop using the Open command from the File menu.
Step 2
Duplicate the image layer. To do this, right-click on the only existing layer in the Layers palette and select the Dublicate layer option from the context menu.
Step 3
Sharpen the image without affecting the color information. To do this, put the photo in Lab color mode by choosing the Lab option, which after a short search can be found in the Mode group of the Image menu. Go to the Channels palette by clicking on the Channels tab, which can be seen next to the Layers tab. Click on the Lightness channel. The image will become black and white. Sharpen the image in the Lightness channel with the Unsharp Mask filter. The settings window for this filter is opened by the Unsharp Mask command from the Sharpen group of the Filter menu. Adjust the sharpness settings by eye and click OK.
Step 4
Set your photo to RGB mode using the RGB option from the Mode group of the Image menu.
Step 5
Vintage photos often look a little faded. To simulate this effect, create a new adjustment layer using the Create new fill or adjustment layer button at the bottom of the Layers palette. Select the Brightness / Contrast option from the menu that opens when this button is clicked. In the filter settings window, set the Brightness value to -15, and set the Contrast parameter to -50. Click the OK button.
Step 6
Add vignettes to your photo. To do this, create a new gradient fill layer by clicking on the Create new fill or adjustment layer button. In the menu that opens, select the Gradient option. In the Gradient Options docker, select the Radial style from the Style drop-down list. Check the Reverse checkbox so that the dark part of the gradient fill is not in the center of the image, but at the edges. Click OK and convert the gradient layer to a bitmap. To do this, right-click on the gradient fill layer and select the Rasterize layer option from the context menu.
Step 7
Transform the gradient layer so that the dark areas move to the edges of the image. To do this, use the Free Transform command from the Edit menu. Use the mouse to drag the edges of the frame to achieve the desired result. Apply the transformation by pressing Enter and change the Blending Mode of the Gradient Fill layer from Normal to Soft Light. This can be done by choosing Soft Light mode from the drop-down list at the top of the Layers palette.
Step 8
Add some blue and yellow tints to the image. To do this, create a new adjustment layer from the bottom of the layers palette. Select the Curves option from the list that appears, and in the filter settings window, select the Red channel from the drop-down list of channels. Add an anchor point in the middle of the curve by clicking on it with the left mouse button. Drag down the topmost anchor point to add a blue tint to the highlights of the image. Drag up the bottom anchor point to add a red tint to the shadows. Switch to the Blue channel. Do the same operations with it as with the red channel. This will add a yellow tint to the light parts of the image and blue to the shadows. Drag down the center anchor point a little to give the entire photo a yellowish tint. Click OK.
Step 9
Save the photo with the Save As command from the File menu.


