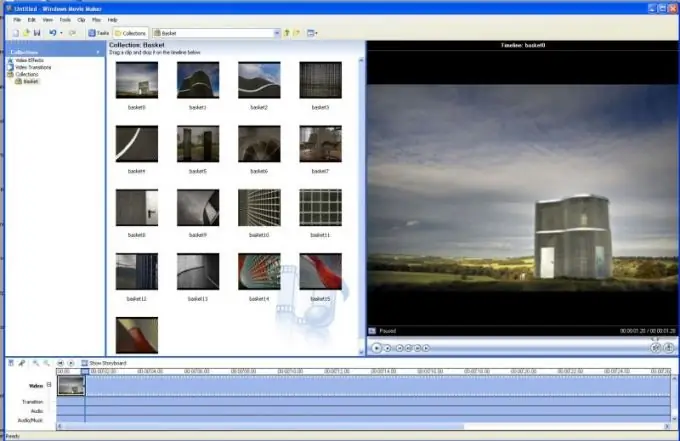
To create your own video clip, you must use the software bundle. The choice of specific utilities depends on the appropriate method and type of source files used for splicing the clip.

Necessary
- - Adobe Premier;
- - Movie Maker.
Instructions
Step 1
If you want to create your own video using ready-made photos or images, then use Movie Maker. To install this utility on Windows Vista or Seven operating systems, use version 2.5 or higher. Start Movie Maker. Open the explorer and find the required images.
Step 2
Select the ones that you plan to use to create the video, and press the keyboard shortcut Ctrl and C (copy). Now expand the program window and press the Ctrl and V (paste) keys at the same time. Arrange the added files in the order you want. Now select all of them and drag them with the left mouse button to the visualization strip located at the bottom of the working window.
Step 3
Set the display time of the image for each specific slide. Leave the default if not required. Now choose a melody that suits your clip. Move it from Explorer to Movie Maker's working window. Copy it to the Sound field under the render menu.
Step 4
Open the File menu and click the Save As button. Select the folder where the video will be saved and enter a title. Specify the parameters of the fragment to be saved. Better to choose the "Best image quality" option. Wait for the process of saving your clip to complete.
Step 5
If you need to include special effects in your clip, use Adobe Premier. Its principle of operation is very similar to the Movie Maker utility. Select the slide you want to change the look of and select the selected effect. A similar procedure can be performed with video clips.
Step 6
Now open the File menu and choose Save As. Select the format of the future video clip and set the value for the bit rate parameter. Enter a file name and select a folder to save.


