Without support for the TCP / IP network protocol on a computer, it is impossible to access the Internet. There can be several reasons why the protocol does not work. For example, a system malfunction occurred, or the protocol was manually disabled by the network administrator.

Necessary
- - access to the computer with administrator rights;
- - a network connection for which you want to enable TCP / IP protocol support.
Instructions
Step 1
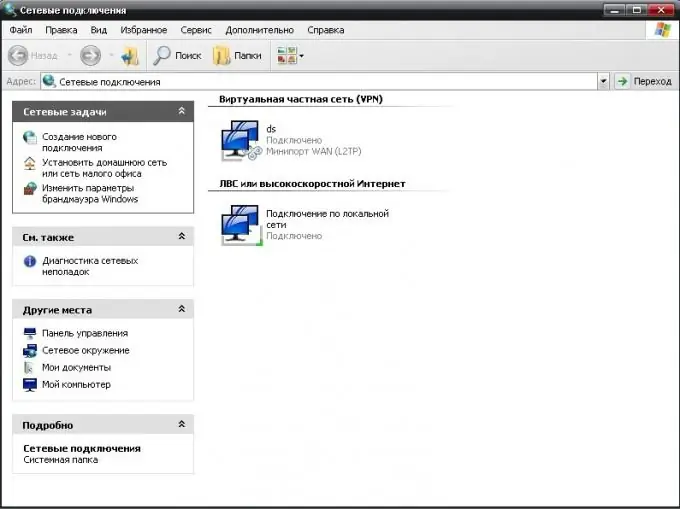
In order to enable support for the TCP / IP network protocol for connecting to the Internet, you need to go to the properties of this connection. To do this, click the "Start" button, select "Connection" from the menu. Then select "show all connections". The "Network Connections" folder will open.
Step 2
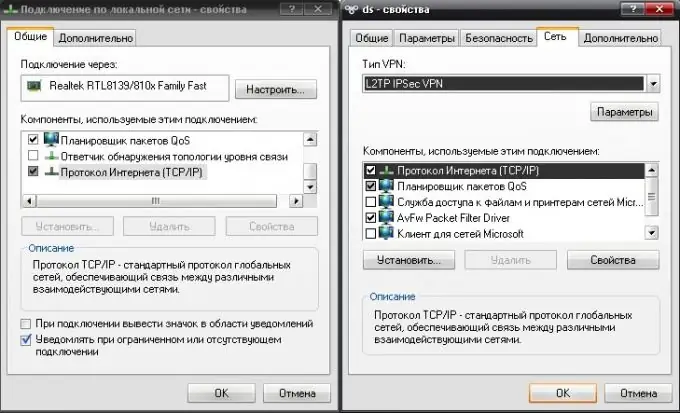
Click on the required connection with the right mouse button. In the menu that opens, select the "Properties" item. To connect via a local network, go to the "General" tab, to connect to the Internet, open the "Network" tab.
Step 3
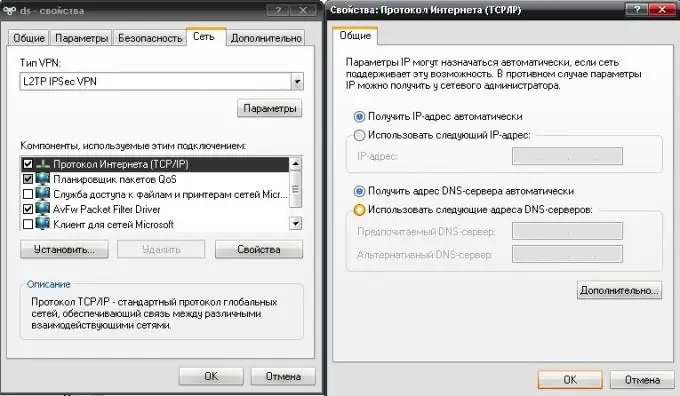
Select the line "Internet Protocol (TCP / IP)" in the list of protocols and check the box next to this item. This will enable support for the corresponding network protocol. Click the "Properties" button under the list of protocols to set the required network parameters: set an IP address for connection or specify a DNS server.
Step 4
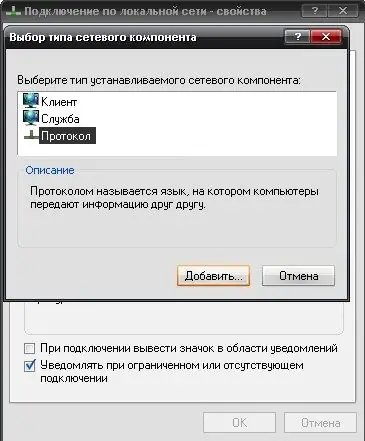
If you cannot find the TCP / IP network protocol in the list of protocols, you must install it yourself. To do this, in the properties of the connection in the tab with protocols, click the "Install" button. In the menu that opens, select the type of network component "Protocol" and click the "Add" button.
Step 5
Select Microsoft TCP / IP version 4 network protocol from the list. Most networks use this version. Click OK. Next, the installation of the component will begin. Follow the instructions of the installation wizard. After installation, the Internet Protocol TCP / IP will be displayed in the list of protocols, and you will be able to manage it.


