There are many programs that allow you to record your voice on video. However, the easiest way to do this is using the built-in Windows services, which also allow you to apply various effects to the scale. If you are not satisfied with the result, you can carry out finer processing of the audio track using third-party software, for example, the free sound editor Audacity.

Necessary
- - microphone;
- - headphones
Instructions
Step 1
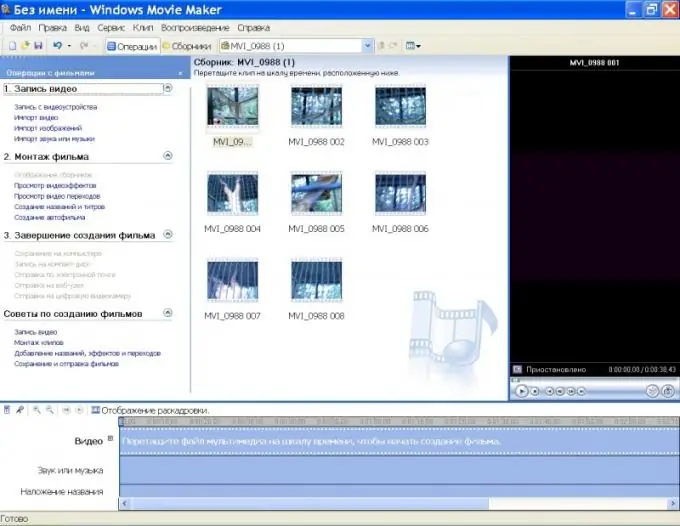
Connect a microphone to the corresponding connector on the back or front panel of the system unit. If you are using a microphone with headphones headset, connect the device to the headphone jack. In the C: / Program Files / Movie Maker folder, double-click the moviemk.exe startup file.
Step 2
On the left side of the Movie Maker window, called the task pane, in the Record Video section, click the Import Video link and open the folder with your video. Click on its name and click "Import". If you need to dub several videos, hold down Ctrl and mark all the necessary files one by one. The video files are displayed in the content area.

Step 3
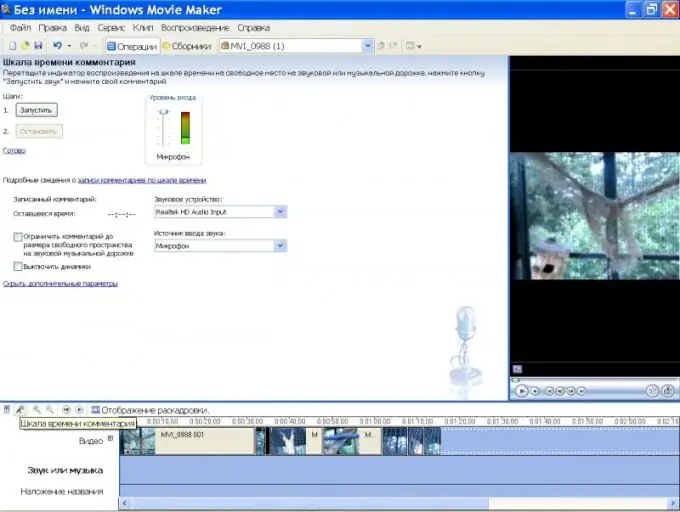
At the bottom of the window is the storyboard and timeline area. In storyboard mode, drag the video files one by one to this area and switch to the timeline mode. Move the cursor to the left border of the footage. Click on the microphone icon to the left of the timeline. A new Comment Timeline window will appear.

Step 4
Click the "Run" button and start to say the text of the comment. In this case, the microphone indicator should display the changing level of the input signal, and the cursor in the timeline area should move to the right, towards the end of the video sequence. The viewing area displays the current video frames.
Step 5
When the video sequence ends, the save comment window appears. By default, the folder "Desktop / My Documents / My Videos / Comment" is offered for saving. You can specify a different folder to place the voice recording.
Step 6
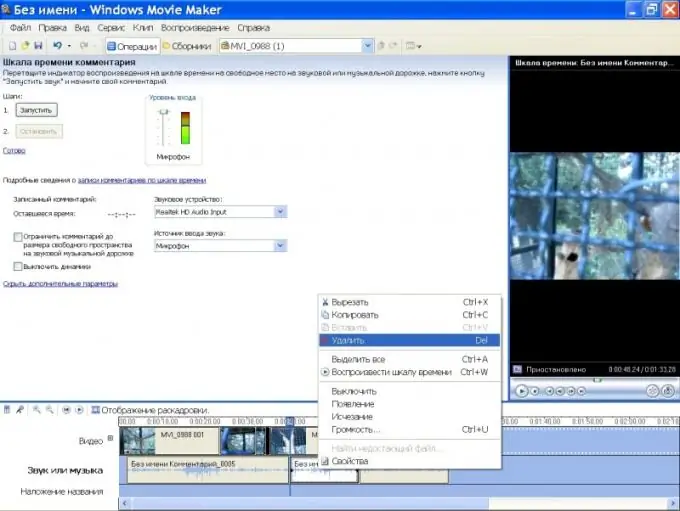
In the timeline area, click the play button and watch the finished video. If you do not like some parts of the scale, you can delete them. To do this, mark the left border of the area to be deleted with the cursor on the timeline and press Ctrl + L, then - the right border and again use Ctrl + L. Right click on the selected fragment and click "Delete". After that, place the cursor on the left border of the gap and start sound recording as described above.

Step 7
Having split the scale into fragments using the Ctrl + L keys, you can apply various effects to them. Right-click on the "Sound or Music" section to bring up the context menu and select the required command from it. For example, you can set different volume levels for different parts of the audio track, or add a fading effect to the sound.
Step 8
To save the video clip with the overdubbed voice, return to the main window of the program and in the section “Finishing the creation of the movie” click the required link: “Saving on a computer”, “Burning to a CD” or others. Follow the instructions of the save wizard.


