There are a huge number of programs for stitching panoramic images. Some of them are free, some are shareware. In order not to keep a lot of image processing programs on your computer, it is better to use a universal program for all types of image processing Adobe Photoshop. How to glue a panorama using it?

Necessary
Computer, Adobe Photoshop program
Instructions
Step 1
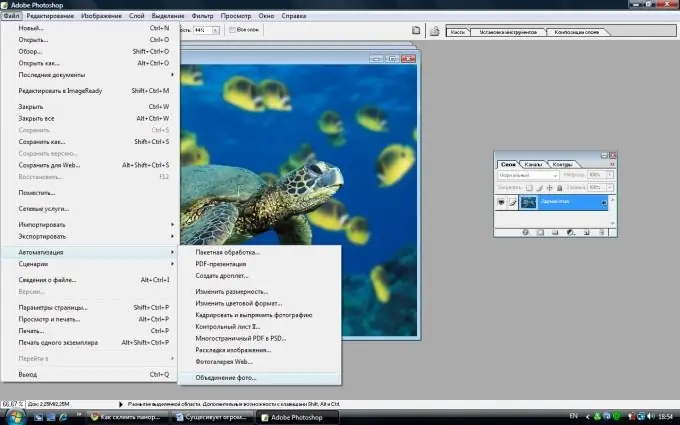
Open Adobe Photoshop. The version number does not matter except for very old releases. Go to the "File" menu in the upper left corner of the program window. Then click on the "Open" line on the opened tab or press Ctrl + O.
Step 2
In the file browsing window that opens, select the image you need and click on it. The image will open in the Adobe Photoshop window. Repeat the above steps for your other image files that you are going to merge.
Step 3
After you have opened all the photos you want to glue, go back to the "File" menu and click on the "Automation" line. On the tab that appears, click on the line "Merge photos ….". A window will appear listing the files you selected. In this window, just click on the "Ok" button.
Step 4
Your files will appear in a new window, superimposed on one another. If you have a window that says "The photomerge module could not automatically bring any images to a single panorama ….." etc., then click "OK" and just drag the images from the upper area into the working window. Drag them apart with the mouse. The opened images have a semi-transparent appearance. They can be dragged with the mouse over the entire working surface of the window, superimposed on each other.
Step 5
On the left side of the window there is a panel with symbols for an arrow, image rotation, zoom and a hand for manipulating photos. In the right area there are auxiliary options for image enlargement, transformation and other operations.
Step 6
After you combine the images, click on the "Ok" button, and you will have a ready-made panorama. Save the finished panorama to the desired location on your computer and in the required format by opening the "File" - "Save As …" menu.


