The joy of buying a brand new hard drive can sometimes be overshadowed by a small problem when the drive is connected to a computer, but the system does not see it at all. The first thoughts that arise are that the purchased hard drive is faulty, but let's check the simplest ways. The disc may not be visible for other reasons.

Instructions
Step 1
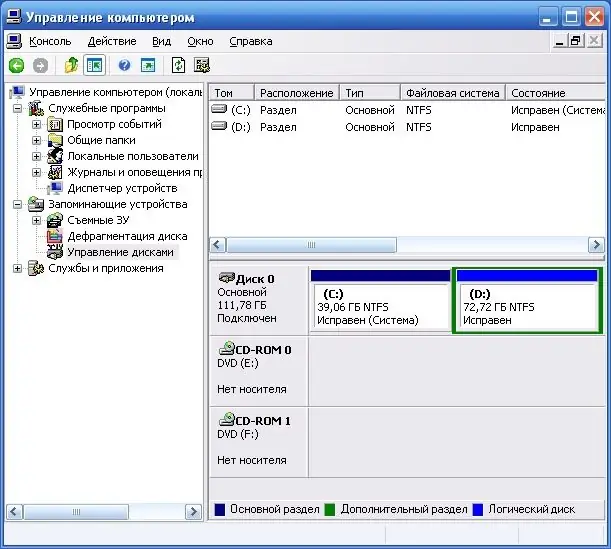
First of all, I recommend checking if the new hard drive is visible at all. To do this, right-click on "my computer" and select "control". In the window that appears, go to the "Disk Management" tab.
Step 2
In the upper right corner, we see lists of disks that we can use when working. And in the lower right corner, each line is assigned to a separate physical device, and if 1 hard disk is split into two volumes, then the line will be divided into two parts in proportion to the space that each volume contains.

Step 3
Most often, in the first line we see drive C and drive D. In the next line, we see the DVD device. If you see another line that does not have any identifying marks, then this is your disk. In this case, the problem was that the hard drive you purchased was not yet partitioned into volumes.
Step 4
To do this, right-click on the disk, select "format" from the menu. You can partition a disk into multiple volumes by formatting a fraction of the disk's size. After completing the formatting, a part of the disk will be marked in light, as ready to use.
Step 5
The other part will be grayed out, which means it needs to be formatted. Then you need to assign a letter to this drive. To do this, press the right mouse button on the disk, select the item "change drive letter".
Step 6
In the window that opens, you must click the "add" button, and then select the letter under which you will enter this disk, click "OK" in all windows.


