Let's consider one of the simplest ways to reduce the size of an image using tools in Adobe Photoshop.

Instructions
Step 1
Open the image by choosing the Open command from the File menu. The image is loaded.
Step 2
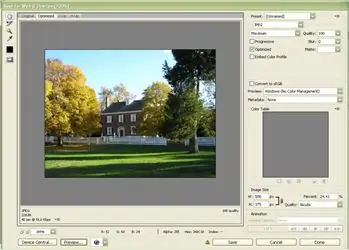
Find the Save for Web command in the same menu. A window opens in front of us with many parameters, but do not be afraid, we will have to manage only a few of them.

Step 3
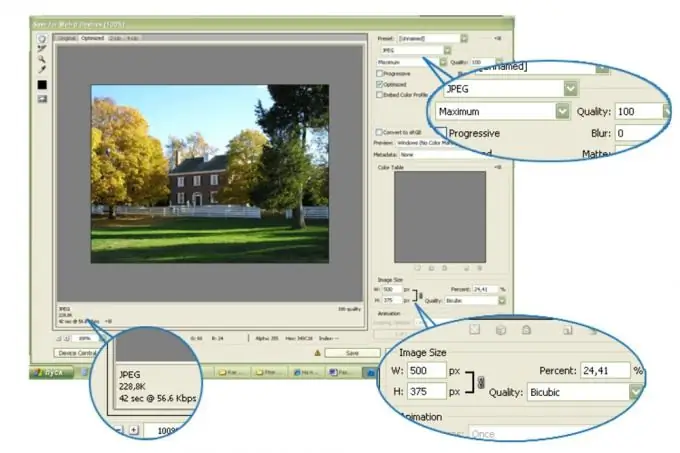
The generally accepted image format for saving images is JPEG. There are other ways of storing information about the image, each of them has its own special purpose, its pros and cons. It is also necessary to save images in these formats, but there is no need to do this without special requirements. Therefore, we select the JPEG item from the proposed list in the uppermost field of the settings window.
Step 4
If the size of the saved file is critical to us - the smaller the file, the faster the image is transmitted through the communication channels and if the connection is slow, then the images are loaded for a long time - then we have the Quality parameter at our disposal. Of course, the lower the quality, the smaller the file. (Information about the size of the output file can always be seen in the lower left corner of the window under the picture)
Step 5
But the most important for our task, of course, are the parameters responsible for the size of the image itself. At the bottom right we see the fields in which the values of the width and height of the original image are highlighted. It's easy to put new numbers in there. As a rule, if we are preparing a picture for uploading it to the network or sending it by e-mail, then the size of the maximum side can be no more than 1000 pixels (otherwise, when viewed, it will go beyond the edges of the monitor), so this figure can be safely entered instead of the maximum value. You can simply specify the new size as a percentage, for this there is a corresponding field to the right.
Having specified the new size, let's see how our image began to look in the preview window. If necessary, we can adjust the volume of the output file with the above-mentioned Quality parameter, however, trying to keep it as possible as possible.
Step 6
After finishing the conversion, click on the Save button and specify the location on the disk and the new name of the resulting file.


