The Windows operating system uses a wide variety of fonts to display text on the screen and for printing. A font is a set of characters with common characteristics, such as stroke size and serifs at the top and bottom edges. To work with computer graphics, create an original design for web pages or develop a corporate identity for documents, you often need to install a font that is not in the pre-installed collection. A few simple steps in the control panel of your computer will help you install new fonts.

It is necessary
- - Administrative rights to control the computer;
- - files with new fonts.
Instructions
Step 1
In Control Panel, click the Start button, select Settings and Control Panel, then double-click the Fonts icon.
Step 2
In the "Fonts" window that opens, open the "File" menu, select the "Install Font" command.

Step 3
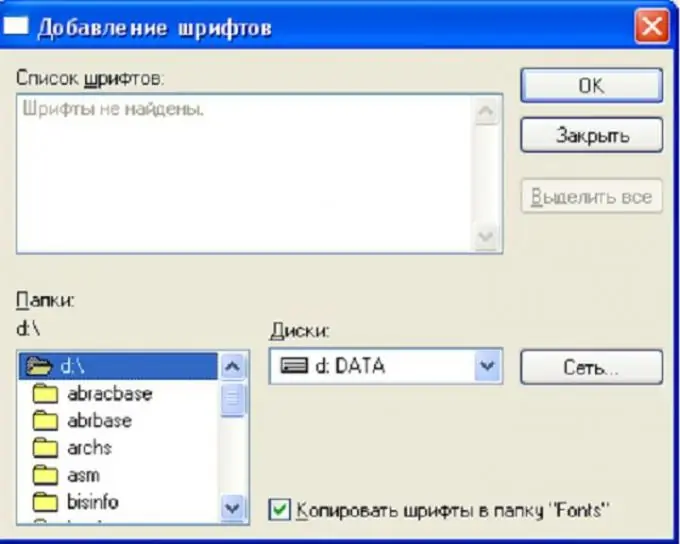
In the "Add Fonts" dialog box that opens, set where you want to load new fonts.
To do this, select the required drive in the "Disks" combo box.
Double-click the folder containing the fonts you want to install.
In the Font List box, select a font and click OK.

Step 4
To save space on your local hard drive, you can clear the Copy fonts to Fonts folder check box. In the future, when working with fonts installed in this way, you will need to connect to the network resource from which the installation was made.


