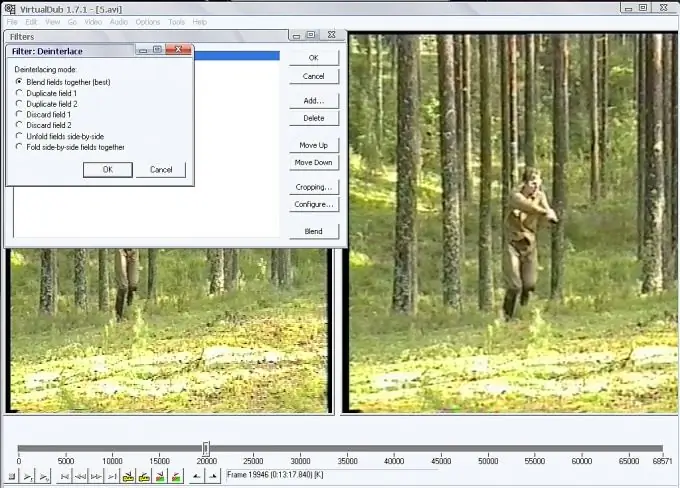
The comb effect occurs when interlaced video is not displayed correctly on a progressive scan monitor. You can cope with this problem by applying the Deinterlace filter to the video, which is available in many video editors and converter programs.

Necessary
VirtualDub program
Instructions
Step 1
Load the video into VirtualDub using the Open video file command at the top of the File menu. If you are more accustomed to using keyboard shortcuts, use the shortcut Ctrl + O.
Step 2
Apply a Deinterlace filter to the open file. To do this, open the window for filters applied to the file using the Filters command from the Video menu. Click on the Add button and select the Deinterlace filter from the list. Click on the OK button. Choose one of the offered deinterlacing modes. In the Blend fields together mode, information from an even and odd field is mixed, which results in a slightly blurry video of the same size as the original. This is usually the recommended mode. You can observe the result of applying the filter in the right window of the program after clicking the OK button in the deinterlacing mode settings window and in the filters window.
Step 3
Turn on video preview with the filter applied to it using the Preview filtered command from the File menu or by pressing Enter. If you are not satisfied with the result of denterlacing, open the applied filters window and click the Configure button. In the modes window that opens, select any other field processing mode and see the result.
Step 4
If your image looks too blurry as a result of applying the filter, try applying the Sharpen filter to it. To do this, open the filters window, click on the Add button and select Sharpen from the filter list. Click on the OK button and adjust the degree of filter application using the slider. When finished, click OK. You can reconfigure the parameters of any of the two applied filters by selecting the one you need in the applied filters window and clicking the Configure button.
Step 5
If you are satisfied with the result of applying the filters, save the edited video with the Save old format AVI command from the File menu. Specify the location on the computer disk where the edited file will be saved, enter the name of the saved video and click the "Save" button.


