The central processor is the brain of the computer, so when you decide to change it, you should do it with extreme caution. Replacing the processor may be relevant in case of failure of the old one or if you need more performance of the PC.

Necessary
- - processor;
- - thermal paste;
- - Phillips and flathead screwdrivers.
Instructions
Step 1
First you need to power off the computer by unplugging the power cord from it. Then lay it on its side and open the system unit by removing the side cover from it, which is located opposite the motherboard. The lying position is very important, as some heat sinks are attached to the motherboard with screws and a special holder located on the back of the motherboard. If the system unit will stand upright, then by unscrewing the radiator, you can knock off the holder and damage the board.
Step 2
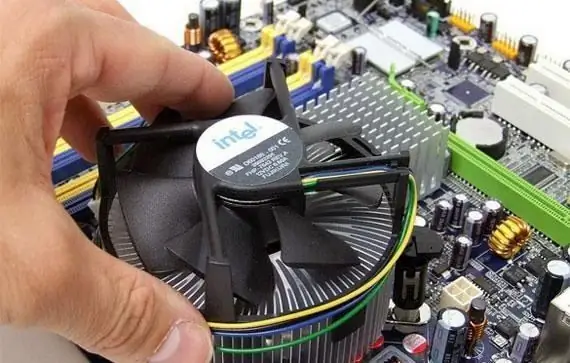
Find a heatsink with a cooler on the motherboard, and then remove it, having previously disconnected the fan wire connected to the motherboard. You may need a screwdriver depending on the type of radiator attachment. In the case of a screwless fastening, the radiator with a cooler can be removed by hand by turning the heads of all fasteners in the direction of the arrows depicted on them and pulling it up. Thoroughly clean the old heat transfer paste from the radiator soleplate. Take the time to clean the accumulated dust from the heatsink and cooler. It is also worth taking care of the fan lubrication in the event that it emits unnecessary sounds during the operation of the PC.
Step 3
Under the heatsink, you will find the processor, under the bezel with a latch. First, push the latch down and slide it to the left to release it, then lift it up. Now open the bezel and use a small flat-blade screwdriver to remove the old processor using the utmost care.
Step 4
When installing a new stone, make sure that the mark on the processor and the cut on the socket match. After installation, close the frame and reinstall the lock. Lubricate the processor surface with fresh heat transfer paste, which will be in contact with the heatsink sole. Do not use too much thermal paste, as this may cause your personal computer to malfunction.
Step 5
Install the heatsink by snapping or screwing in the heatsink. Connect the cooler power cable to the motherboard. Next, replace the side cover of the system unit, then connect the power cord to the computer. Check if your PC is working properly. If the CPU overheats, it will indicate that the radiator was not installed tightly enough. In this case, reinstall it.


