In the standard set of the Windows XP operating system, there is only one theme with several colors. Despite the fact that the constantly running automatic update service offers to install various kinds of system program updates, the design does not update, but this is easy to fix with the help of special programs.

Necessary
Uxtheme Multi-Patcher software
Instructions
Step 1
In addition to the "windows" of the operating system, you can use the boot screen and system sounds to change the appearance. By default, the option to support third-party themes is disabled in Windows XP, while a directory for storing themes exists. Consequently, the possibility of changing the external design exists, but it was closed, apparently so as not to waste the resources of a personal computer.
Step 2
To activate the themes of the design change, you can use the special utility Uxtheme Multi-Patcher. This program is completely free and freely available on the Internet. You can download this program from the official site windowsxlive.net. After loading this web page, click the Products menu button.
Step 3
Find the Uxtheme Multi-Patcher utility in the list of programs and left-click on the link. In the window that opens, go to the Download section and click on the utility link. In the new window, make sure that your operating system is in the list of the listed systems (not every version of this program will work with Windows XP), click the link with the name of the application.
Step 4
After downloading the utility to your computer, which is in the archive, run it. Use the WinRar archiver or the Total Commander file manager, if you cannot open the archive, and the system asks you to specify the program with which to do this.
Step 5
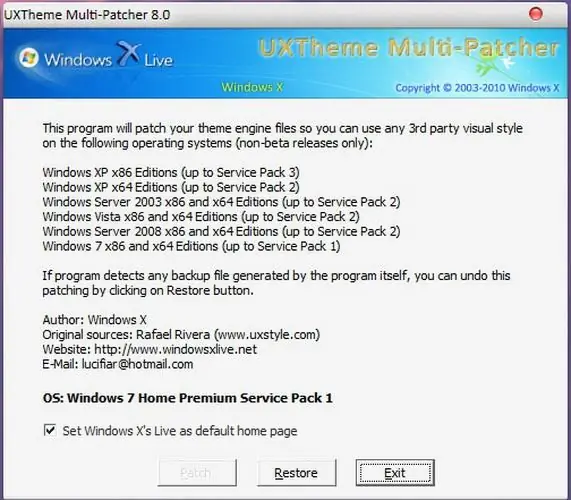
After starting the program, a standard window will appear in which information about the program and its functions will be given. To avoid visiting the developer's website again, uncheck Set Windows X's Live as default home page and click the Patch button.
Step 6
A small window will appear on the screen with the message "To complete the installation, a system reboot is required …". Click the "OK" button if you want to restart your computer now, otherwise you should click the Cancel button.
Step 7
After the reboot, it remains to download the new skins and copy them to the C: WINDOWSResourcesThemes folder so that they become available in the Appearance tab of the Display Properties applet.
Step 8
To go to the Display Properties applet, right-click on the desktop and select Properties. In the window that opens, go to the "Design" tab. In the "Windows and Buttons" section, select the appropriate theme. In the "Color Scheme" block, select the color scheme that you like best.
Step 9
To save the assessment of the selected style and color, click the "Apply" button. Click OK to save the changes.


