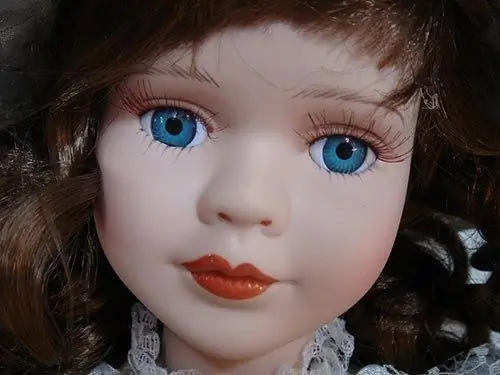
The capabilities of Adobe Photoshop go far beyond retouching digital bitmaps, adding various effects to them, etc. One of the types of processing of real images in this graphics editor is their stylization in a certain manner. So, in the photo, a person can make a doll's face, which looks very original in combination with a properly selected background.

It is necessary
- - original photo;
- - Adobe Photoshop.
Instructions
Step 1
Open in Adobe Photoshop the original photo containing the face you want to make a puppet. Convert the current layer from background to main. To do this, select Layer, New and "Layer From Background …" from the menus.
Step 2
Copy the images of the eyebrows, eyes, mouth and nose to separate layers. Use the Polygonal Lasso tool to select the desired fragment. At the same time, leave a small margin with a picture of leather around the edges. Press Ctrl + J or choose Layer, New and "Layer via Copy" from the menus to create a layer with a copy of the selection. Transfer each eye and eyebrow to a separate layer. Copy the nose, starting from the place located above the bridge of the nose.
Step 3
Delete the eyebrows, mouth and bottom of the nose in the original image. Turn off the visibility of all layers except the original. Switch to it. Activate the Clone Stamp tool, pick up a brush that is comfortable to work with. Perform rough retouching. Finish the bumps with the Patch and Healing Brush tools.
Step 4
Make doll eyes. Turn on the visibility of the layer with the image of one of the eyes and switch to it. Activate the transformation mode by scaling by choosing Edit, Transform and Scale from the menus. Click the Maintain aspect ratio button in the top panel or press and hold the Shift key. Enlarge the eye 1.5-2 times. Apply transformation by double clicking in the center of the selection. Use the Move tool to accurately position the transformed image. Do the same with the second eye.
Step 5
Switch to the mouth layer. Reduce it. Use the same transformation by scaling. In this case, however, you may not activate the automatic proportioning mode by stretching or squeezing your mouth vertically.
Step 6
Process the nose image. After applying a scale transformation, shrink it 1.5-2 times, but only horizontally. Use the Move tool to position it exactly over the nose in the original image.
Step 7
Deform the eyebrows in Distort or Warp modes by selecting the corresponding items in the Transform section of the Edit menu. Make them thinner and stretched up and to the side.
Step 8
Blend the deformed fragments on separate layers with the main face image. Activate the Eraser tool. Set Brush as its mode of operation. Choose a brush of a suitable size and type. Reduce the Opacity to 20-30%. Switch between layers and erase the edges of the fragments so that they blend smoothly with the background. Merge the layers by choosing Flatten Image from the Layer menu. Use the Blur and Healing Brush to work on the unevenness of the skin and possible imperfections in the image at the seams.
Step 9
Save the result. Press Ctrl + Shift + S. Select the appropriate format, enter the file name. Click Save.


