If you need to configure Routing and Remote Access services in Windows Server 2003 yourself, you can do so. This configuration is necessary so that authenticated users can be allowed to remotely connect to all internal network resources. Windows Server 2003 routing settings are set automatically. But there are situations when this service is disabled and you need to re-configure routing. You can do this yourself. The process is quite lengthy and requires attention, but if you follow these instructions, you can easily do it yourself.

Necessary
access to the server
Instructions
Step 1
Start the installation from the Start button and select Administrative Tools and Routing.
Step 2
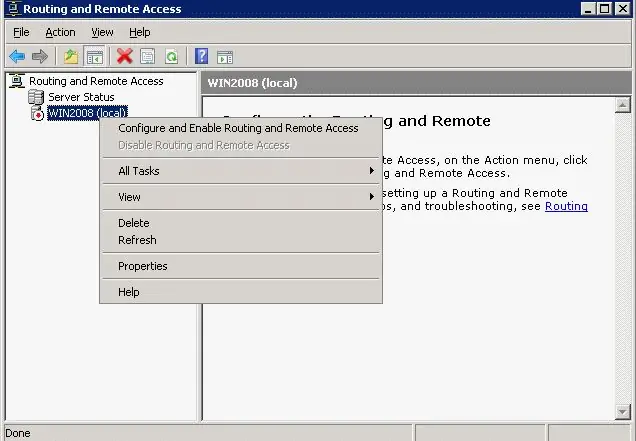
On the left side of the console pane, select the required server (it must match the local server name). If you see a red arrow in the lower right corner, it means that routing is disabled. Go to the next step.
Step 3
Right-click the server name and select Configure and Enable Routing.
Step 4
Run the Routing Server Configuration Wizard, click Next.
Step 5
Click on "Remote Access" and then click on the Next button.
Step 6
Select either VPN or Modem depending on the server task.
Step 7
In the window "VPN connection" select the required network interface of the connection and click "Next".
Step 8
In the Assign IP Addresses window, select the option you want and click Next.
Step 9
Next, the "IP Address Ranges Assignment" window will open. Click Create, enter the required information, click OK and Next.
Step 10
The program may prompt you to change the default settings - don't do this. Click Next.
Step 11
Click Finish, Routing Service is online.


