Only the lazy does not take pictures today. Digital photography allows you to click frame by frame without thinking too much about the quality of the future photo. After all, a marriage can be easily removed, and among hundreds of frames at least a couple of good ones will turn out. But very often it happens that the photograph is generally liked, but its quality is lame. Do not rush to throw it away, you can try to improve the picture using Photoshop.

Instructions
Step 1
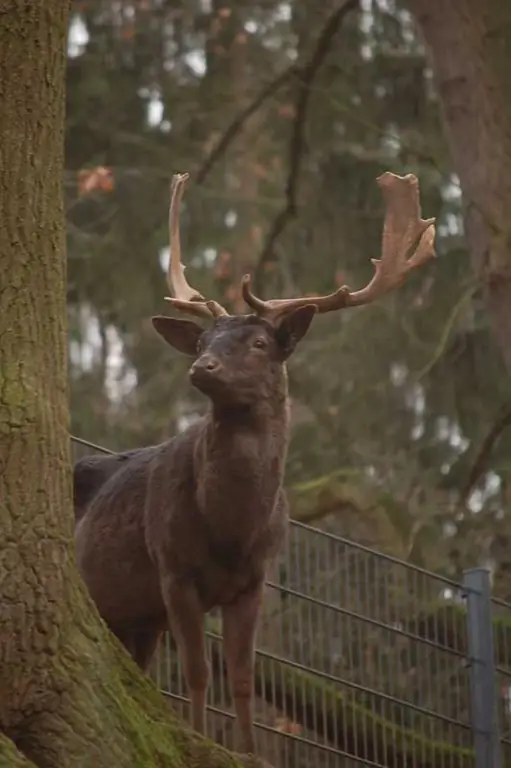
Let's take a random photo. For example, this one.

Step 2
Improving the quality of a photograph always starts with a detailed analysis of it. As we can see, this photo is faded, dark, it lacks sharpness, insignificant details caught in the frame distract the viewer's eyes from the animal. First, let's cut off the unnecessary part of the frame. The Crop tool is located in the toolbar between the brush and the eyedropper. Hold down the right mouse button and frame the frame as you like.
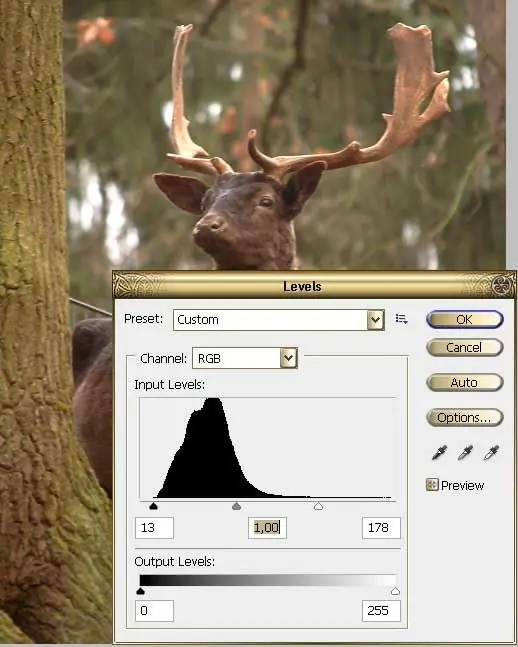
The next step is to click on Image - Adjustmens - Levels in the menu. You will see a window for adjusting levels. As you can see, the histogram is strongly shifted to the left, which explains the overall under-exposure of the image. Move the sliders below the histogram until they reach the edges. It will look something like this.

Step 3
You will immediately notice how much brighter your shot has become. But it lacks sharpness. Duplicate the layer by clicking Layer - Duplicate Layer. Apply Filter - Other - High Pass to the top layer. Adjust its parameters so that the contours of the image are slightly guessed in the gray picture. Click OK, change the blending mode of the layers to Overlay. Right click on the top layer in the palette, Megre Down.

Step 4
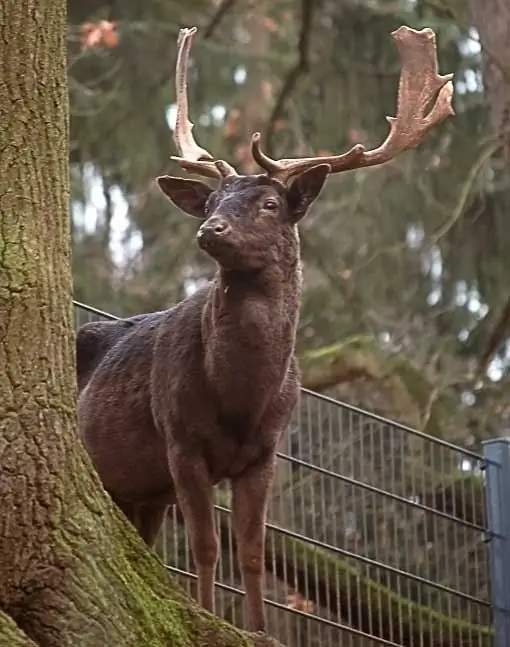
In general, the photo has become noticeably better, but somehow it is too brownish-green. Go to the Image - Adjustmens - Photo Filter menu. For this photo, the Cooling Filter was more suitable, it balanced the colors, made the photo harmonious.
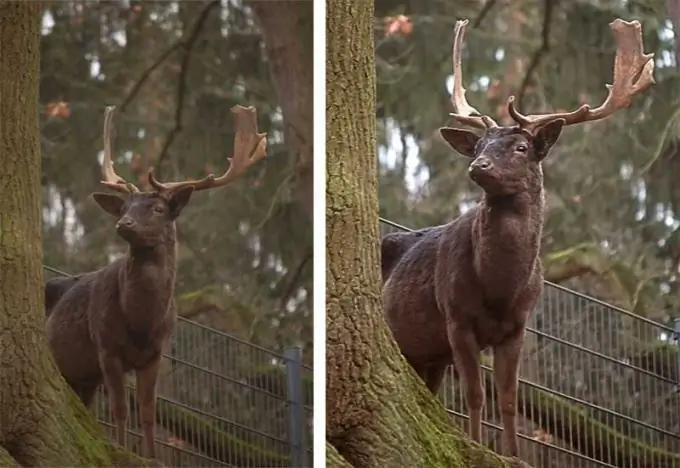
Let's look at the before and after photos. In general, the photo is better. You can, of course, still work on it, muffle out the glare in the background, use the cloning tool to retouch the mesh of the fence, maybe slightly blur the bark of the tree in the foreground. Photo processing never has a single algorithm, each photo needs an individual approach, over time you will learn to determine what kind of processing is needed for a particular picture. The skill will come to you with experience.


