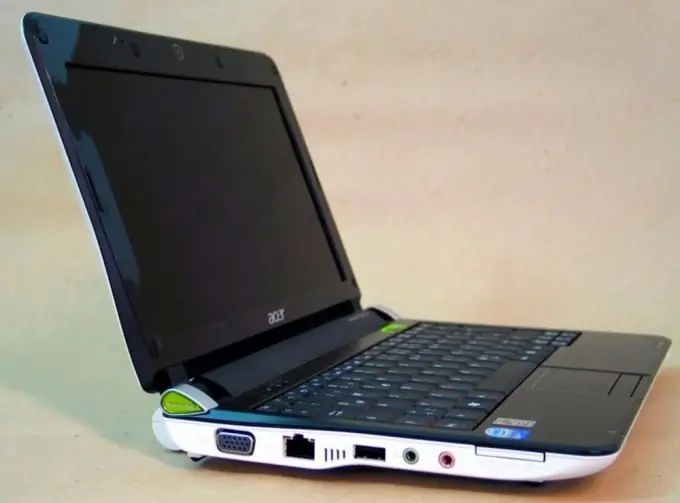
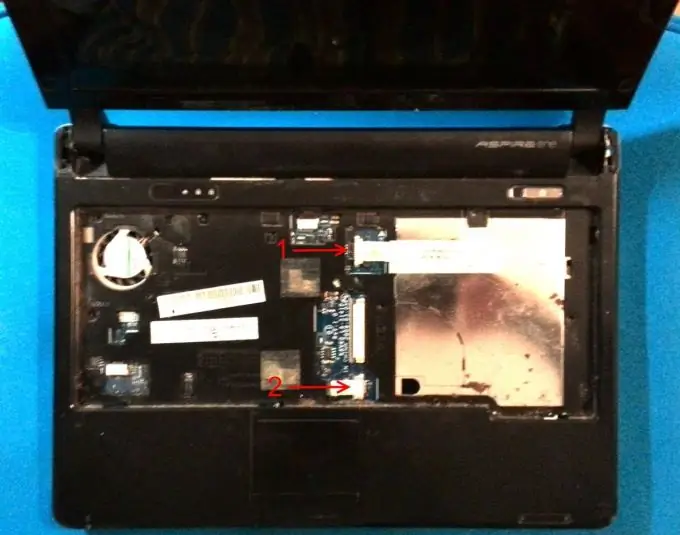
The most difficult and responsible operation when disassembling an Acer Aspire One netbook is to disconnect the cables from the motherboard. Be extremely careful when doing it. The latches are fragile and small and cannot be restored. Having damaged the latch, you will not be able to connect the device to the motherboard and, in fact, the computer will become unusable and all further restoration - only through the service center.
Necessary
- - Acer Aspire One netbook;
- - set of screwdrivers.
Instructions
Step 1
The first step is to de-energize the Acer Aspire One netbook. This is necessary in order not to accidentally burn the motherboard.
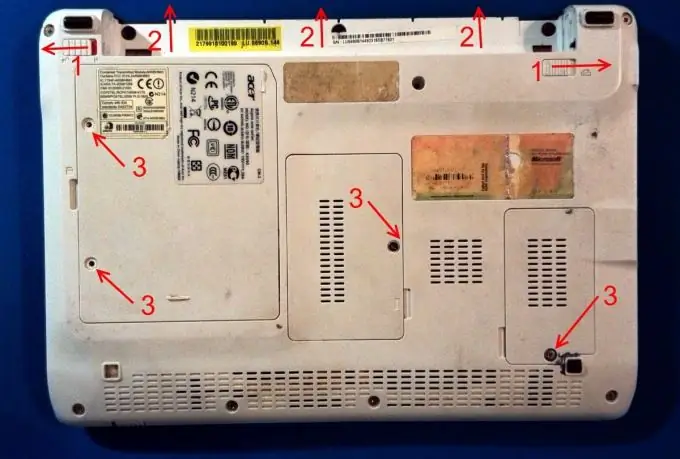
We take out the power cord and take out the netbook battery. To remove the battery, move apart the two latches on both sides of the case and pull the battery out of the case.
Next, remove the 3 bottom covers that cover the connectors for the hard drive, RAM and an additional compartment for the expansion board by unscrewing the 4 screws indicated in the photo.
Step 2
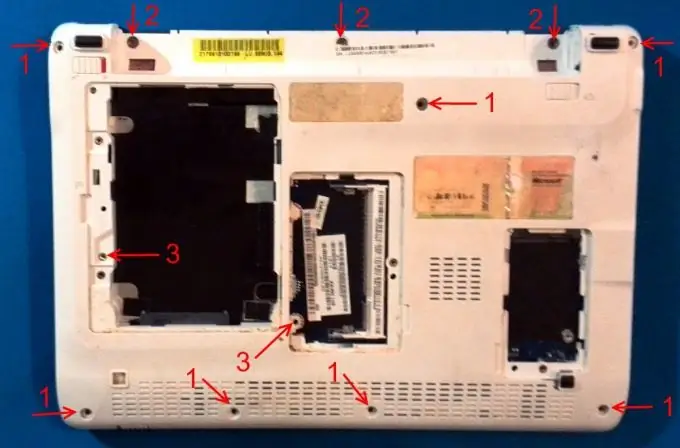
Unscrew all the screws from the bottom of the Acer Aspire One netbook. There should be 7 of them on the case, 3 in the battery compartment and 1 in the RAM compartment.
To remove the hard drive, unscrew 1 screw and pull the drive away from the connector, and then up towards you.
Step 3
Removing the keyboard of the Acer Aspire One netbook. It is attached with plastic latches around the perimeter. From the side of the keyboard, gently prying it with something sharp and moving along the perimeter, separate the keyboard from the case.
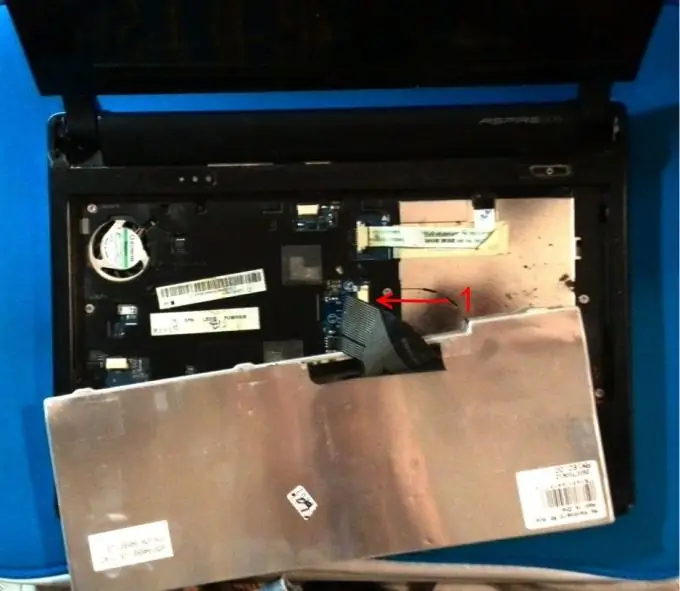
Under the keyboard, of course, there is a touchpad cable and LED indicators. Disconnect it by pulling the small plastic tab away from the connector and then pulling the ribbon cable out of the connector. Be extremely careful when releasing the loop, as latches are very fragile and small and cannot be restored.
Step 4
After removing the keyboard of the Acer Aspire One netbook, you need to disconnect two more cables marked in the photo from the motherboard in the same way. We also observe the utmost care when performing this operation.
Step 5
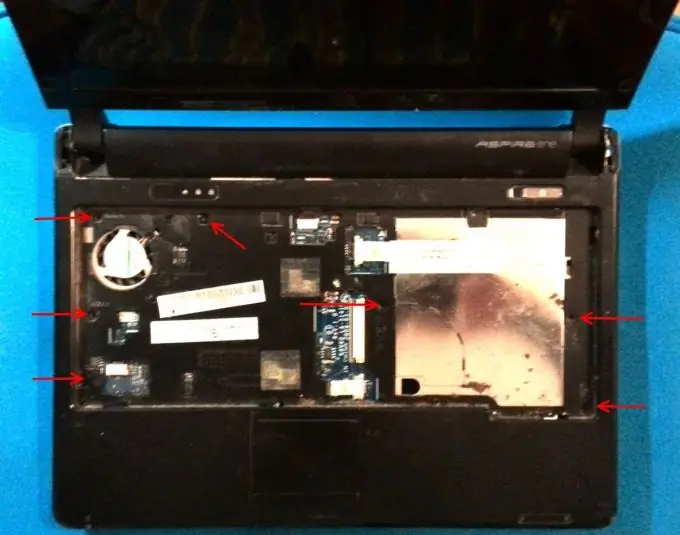
We unscrew all the screws marked in the photo, which are located under the removed keyboard.
Step 6
You can now remove the top cover of your Acer Aspire One netbook. Full access to the motherboard, processor, cooler, speakers, power connector, etc.


